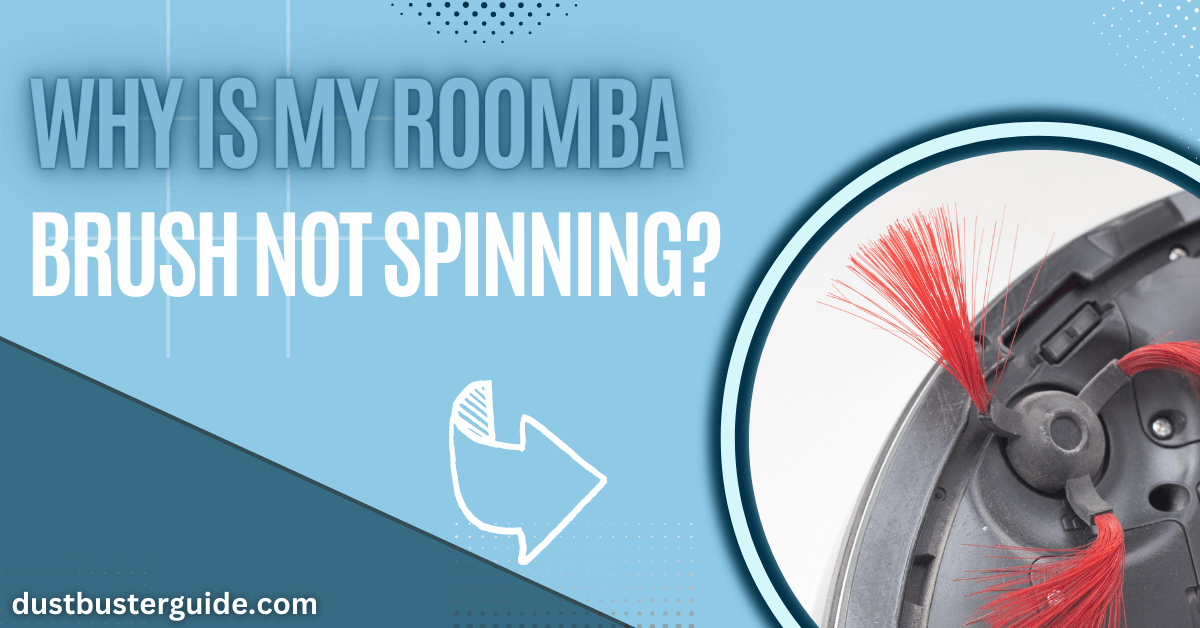
Ever witnessed your Roomba’s cleaning ballet missing a crucial performer, as the brush remains eerily still? If you’ve ever pondered, why is my Roomba brush not spinning? you’re not alone in this floor-cleaning mystery.
Picture this: your trusty cleaning companion in a choreographic glitch, with the brush refusing to twirl. In just a couple of lines, the answer pirouettes into view: your Roomba’s brush might be entangled with debris or facing technical hitches.
But before you assume it’s a robotic dance malfunction, join us in this exploration. We’ll guide you through potential solutions, ensuring your Roomba’s cleaning routine resumes with the graceful spins you’ve come to expect!
Why Is My Roomba Brush Not Spinning – Possible Causes
Why isn’t my Roomba’s brush spinning? This is a common issue that many Roomba owners face, and there can be several reasons behind it.
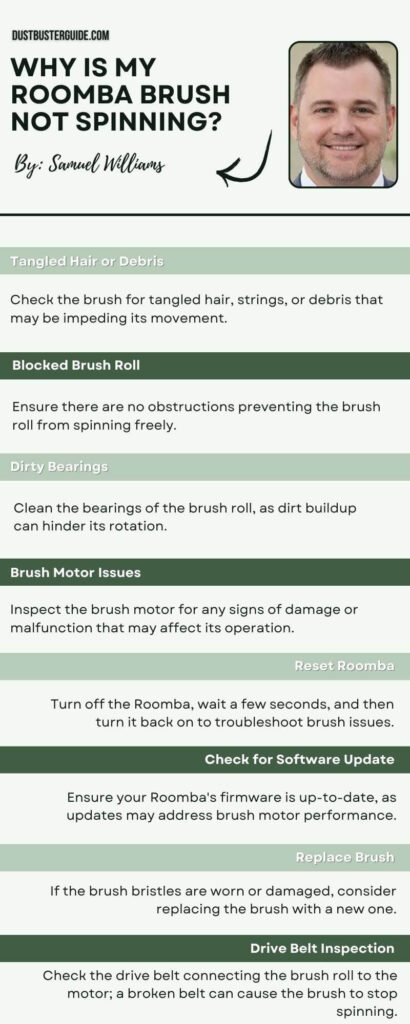
- One possible cause could be a clogged brush. Over time, dirt, hair, and debris can get tangled in the brush bristles, preventing it from spinning freely. To resolve this, we need to remove the brush and clean it thoroughly.
- Another reason for the brush not spinning could be a loose or damaged belt. The belt is responsible for connecting the motor to the brush and allowing it to rotate. If the belt is loose or worn out, it may not have enough tension to spin the brush.
- It’s also possible that the brush motor itself is malfunctioning. If you have cleaned the brush and replaced the belt but the brush still won’t spin, the motor may need to be replaced.
- Lastly, it’s important to note that some Roomba models have a brush cleaning indicator that notifies you when the brush needs to be cleaned. If this indicator is on, it means that the brush is too dirty and needs to be cleaned before it can spin properly.
If your Roomba’s brush is not spinning, it could be due to a clogged brush, a loose or damaged belt, a malfunctioning motor, or a brush cleaning indicator that needs to be reset.
How To Fix A Roomba Brush That Is Not Spinning
Troubleshooting Tips to Get Your Roomba Brush Back in Action
If you’re experiencing issues with your Roomba brush not spinning, don’t worry! There are a few steps you can take to fix the problem and get your Roomba back to cleaning efficiently. Here are some tips to help you troubleshoot the issue.
- First, check for any debris or tangled hair that may be obstructing the brush. Sometimes, the brush can get clogged with dirt or hair, which prevents it from spinning properly. Use a pair of scissors or a brush cleaning tool to carefully remove any debris from the brush bristles. Make sure to check both the main brush and the side brushes, as both can be affected.
- Next, inspect the brush for any damage or wear. Over time, the brush bristles can become worn out or bent, which can hinder its performance. If you notice any damage, it’s important to replace the brush with a new one. You can easily find replacement brushes online or at your local retailer. Simply remove the old brush and install the new one according to the manufacturer’s instructions.
- Another possible cause for the brush not spinning is a faulty motor. If you’ve checked for debris and damage but the brush still won’t spin, it’s likely that the motor is the issue. In this case, you may need to contact Roomba customer support or take it to a professional technician for repair. They’ll be able to diagnose the problem and help you get your Roomba back in working order.
- Lastly, make sure that your Roomba’s battery is fully charged. A low battery can cause the brush not to spin or function properly. Check the battery level on your Roomba and if it’s low, connect it to the charging dock and let it charge fully. Once the battery is fully charged, try running your Roomba again to see if the brush starts spinning.
Troubleshooting a Roomba brush that isn’t spinning can be done by checking for debris, inspecting for damage, verifying the motor’s functionality, and ensuring the battery is fully charged. By following these steps, you should be able to get your Roomba brush back in action and have your robot vacuum cleaning efficiently once again.
What Lubricant Is Best For Cleaning Roomba Brushes
When it comes to cleaning and lubricating Roomba brushes, two excellent options are silicone spray and mineral oil.
Silicone Spray
Silicone spray is a popular choice for lubricating Roomba brushes due to its versatility and non-reactive properties. It provides a smooth, slick coating on the brush bristles, reducing friction and allowing the brush to spin freely. Silicone spray is resistant to water and temperature changes, making it suitable for various cleaning conditions. Additionally, it helps prevent the accumulation of dirt and debris on the brushes, ensuring optimal cleaning performance.
Mineral Oil
Mineral oil is another effective lubricant for Roomba brushes. It is a natural, lightweight, and non-toxic oil that provides a protective layer to the brush’s bristles. Applying mineral oil to the brushes helps maintain their flexibility and durability, extending their lifespan. Moreover, mineral oil is widely available, affordable, and safe to use on various surfaces.
Graphite Powder
Graphite powder is a dry lubricant that can be used to keep Roomba brushes running smoothly. This fine, black powder is known for its low friction properties, making it ideal for reducing the brush’s resistance and promoting smooth rotation. Graphite powder is especially useful for Roomba brushes that tend to get clogged with dirt and debris since it doesn’t attract dust or grime. Applying graphite powder sparingly on the brush bristles can help maintain their performance and prevent wear and tear.
PTFE (Polytetrafluoroethylene) Lubricant
PTFE lubricants, commonly known as Teflon lubricants, are excellent options for Roomba brush maintenance. These lubricants are designed to reduce friction and provide a slippery surface that prevents debris from sticking to the brush bristles. PTFE lubricants have high thermal stability and chemical resistance, making them suitable for various cleaning conditions. They also offer long-lasting lubrication, ensuring the Roomba’s brushes continue to function efficiently over time
Do’s And Don’ts You Should Know About Roomba Brushes
Make sure you know these DO’s and DON’Ts for maintaining your Roomba brushes! Taking care of your Roomba brushes is essential to ensure that they continue to function properly and efficiently. Here are some important guidelines to follow:
DO regularly clean the brushes to prevent any buildup of dirt, hair, or debris. This will help to keep them in good working condition and prevent any blockages that could cause the brushes to stop spinning. Use a small brush or comb to remove any tangled hair or fibers from the bristles. Regular maintenance will not only keep your Roomba performing at its best but also prolong the life of your brushes.
DON’T use excessive force when cleaning the brushes. While it’s important to keep them clean, be gentle when removing any debris. Applying too much pressure or pulling on the brushes forcefully can cause damage to the bristles or even break them. Take your time and be patient during the cleaning process, ensuring that you’re not causing any harm to the brushes.
DO check the brush bearings regularly. Over time, the bearings can become dirty or worn out, which can affect the performance of the brushes. If you notice any grinding or unusual noises coming from the brushes, it may be a sign that the bearings need to be cleaned or replaced. Regularly inspecting the brush bearings will help you identify any potential issues early on and prevent further damage.
DON’T neglect the maintenance schedule recommended by the manufacturer. Each Roomba model may have different guidelines for brush maintenance, so it’s important to refer to the user manual or manufacturer’s website for specific instructions. Following the recommended maintenance schedule will help you keep your Roomba brushes in optimal condition and ensure that they continue to work properly.
By following these DOs and DONTs, you can ensure that your Roomba brushes remain in good working condition and continue to spin effectively. Regularly cleaning the brushes, being gentle during the cleaning process, checking the brush bearings, and following the manufacturer’s maintenance schedule are all crucial steps in maintaining the longevity and performance of your Roomba brushes. So, take the time to care for your brushes, and your Roomba will thank you with efficient cleaning performance.
How Often Should You Replace Roomba Brushes For Optimal Performance
To ensure optimal performance, it’s recommended that you replace your Roomba brushes regularly according to the maintenance schedule provided by the manufacturer. The frequency of replacement will depend on various factors such as the usage frequency and the type of debris that your Roomba encounters.
Generally, it’s suggested to replace the brushes every three to six months. This will help to maintain the efficiency of your Roomba and ensure that it continues to clean effectively.
Regularly replacing your Roomba brushes is important because, over time, the brushes can become worn out and less effective. The bristles may become frayed or bent, and this can prevent them from properly sweeping up debris. Additionally, the brushes can become clogged with hair, dust, and other particles, which can hinder their ability to spin freely.
By replacing the brushes regularly, you can ensure that your Roomba continues to operate at its best and maintain its cleaning performance.
Another reason to replace your Roomba brushes regularly is to prevent damage to your floors. Worn-out brushes can become rough and abrasive, which can lead to scratches and scuffs on your hard floors. If the brushes become too worn, they may even start to leave marks on delicate surfaces such as hardwood or tile.
By replacing the brushes on time, you can avoid potential damage to your floors and keep them looking their best.
Lastly, replacing your Roomba brushes regularly can also help to prolong the lifespan of your Roomba itself. When the brushes are worn out or clogged, it can put extra strain on the motor and other components of the Roomba. This can result in increased wear and tear and potentially lead to the need for more frequent repairs or even a premature breakdown.
By following the manufacturer’s maintenance schedule and replacing the brushes as recommended, you can help extend the life of your Roomba and keep it running smoothly for longer.
It’s important to replace your Roomba brushes regularly for optimal performance. By doing so, you can ensure that your Roomba continues to clean effectively, prevent damage to your floors, and prolong the lifespan of your Roomba.
Following the manufacturer’s maintenance schedule and replacing the brushes every three to six months is a good rule of thumb. However, it’s always a good idea to check the condition of your brushes regularly and replace them sooner if they appear worn or clogged.
Is It Normal For Roomba’s Main Brush To Wear Out Over Time
Over time, the main brush on your Roomba may naturally wear out, affecting its cleaning performance. The main brush is an essential component of the Roomba’s cleaning system, designed to sweep up dirt, dust, and debris from your floors. However, due to repeated use and contact with various surfaces, the bristles on the main brush can become frayed or worn down. This can result in reduced efficiency in picking up dirt and may even cause the brush to stop spinning altogether.
Regular maintenance and cleaning can help prolong the lifespan of your Roomba’s main brush, but it’s normal for it to eventually wear out. The frequency at which the main brush needs to be replaced can vary depending on factors such as the size of your home, the type of flooring, and the amount of dirt and debris present.
It’s normal for the main brush on your Roomba to wear out over time due to regular use and contact with different surfaces. Regular maintenance and cleaning can help prolong its lifespan, but eventually, the brush will need to be replaced for optimal cleaning performance. By following the recommended guidelines and replacing the main brush every six to twelve months, you can ensure that your Roomba continues to effectively clean your floors and keep your home looking its best.
| Aspect | Description |
|---|---|
| Wear Over Time | Normal due to friction, usage, and debris contact. |
| Performance | May reduce cleaning effectiveness and pickup efficiency. |
| Maintenance | Clean brush regularly, remove tangles, and replace as needed. |
| Guidelines | Manufacturers offer replacement guidance for optimal use. |
Can I Manually Adjust The Brush Height On My Roomba For Different Floor Types?
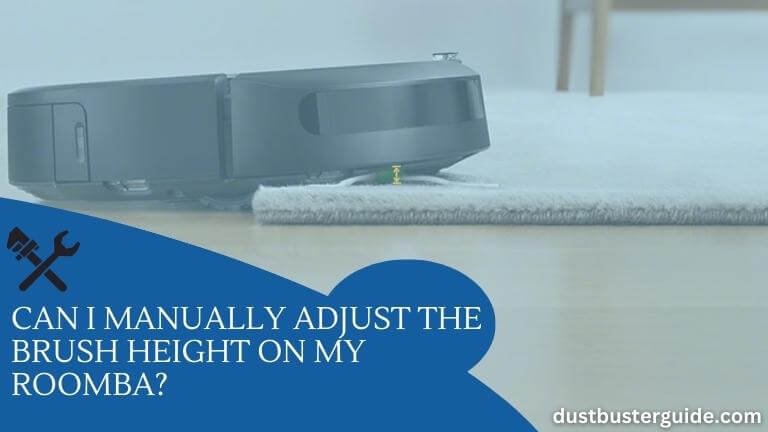
Adjusting the brush height on your Roomba allows you to optimize its cleaning performance on different types of flooring. Whether you have hardwood floors, carpets, or a combination of both, being able to manually adjust the brush height ensures that your Roomba can effectively clean each surface.
Raising the brush for carpets allows for a deeper clean by reaching down into the fibers. On the other hand, lowering the brush height for hardwood floors prevents any potential damage to the surface while still effectively picking up dirt and debris.
To manually adjust the brush height on your Roomba, you can simply use the brush height adjustment tool that comes with your device. This tool allows you to easily raise or lower the brush depending on your specific needs.
It is important to note that the brush height should be adjusted while the Roomba is turned off and not in use to avoid any potential accidents. Additionally, it’s recommended to adjust the brush height before each cleaning session to ensure optimal performance.
When adjusting the brush height, it is crucial to consider the type of flooring you have. For example, if you have thick carpets, you may want to raise the brush height to allow for a more thorough cleaning. Conversely, if you have low-pile carpets or hardwood floors, lowering the brush height will prevent any potential scratching or damage.
Taking the time to adjust the brush height accordingly will not only improve the cleaning performance of your Roomba but also prolong the lifespan of your device.
Being able to manually adjust the brush height on your Roomba is essential for achieving the best cleaning results on different types of flooring. By using the brush height adjustment tool, you can easily raise or lower the brush to optimize its performance. Remember to adjust the brush height before each cleaning session and consider the type of flooring you have to ensure a thorough clean without any potential damage.
So go ahead and make the necessary adjustments to keep your floors looking spotless with your Roomba!
What Are The Best Practices To Extend The Lifespan Of Roomba Brushes?
Now that we know we can’t manually adjust the brush height on our Roomba for different floor types, it’s important to understand how we can extend the lifespan of our Roomba brushes.
After all, a non-spinning brush can be frustrating and can hinder the overall cleaning performance of our Roomba. Luckily, there are some best practices we can follow to ensure our brushes last as long as possible.
- First and foremost, it’s crucial to regularly clean and maintain the brushes. Over time, dirt, debris, and hair can get tangled in the bristles, causing them to become less effective or even stop spinning altogether. By removing the brushes and cleaning them thoroughly, we can prevent this build-up and keep the brushes in optimal condition. It’s recommended to do this at least once a week, depending on the amount of dirt and hair in our home.
- Another way to extend the lifespan of our Roomba brushes is to keep the area where the Roomba operates free from large debris. Objects like small toys, cords, or loose rugs can easily get entangled in the brushes and cause damage. By regularly checking the cleaning area and removing any potential hazards, we can prevent unnecessary wear and tear on the brushes.
- Additionally, it’s important to replace the brushes when necessary. Over time, the bristles can wear down or become damaged, leading to a decrease in performance. Fortunately, Roomba provides replacement brushes that are specifically designed for each model. By regularly inspecting the brushes and replacing them as needed, we can ensure that our Roomba continues to effectively clean our floors.
Maintaining and extending the lifespan of our Roomba brushes is essential for optimal cleaning performance. By regularly cleaning the brushes, keeping the cleaning area free from large debris, and replacing the brushes when necessary, we can ensure that our Roomba continues to spin its brushes and effectively clean our floors.
So let’s make sure to follow these best practices and enjoy a longer lifespan for our Roomba brushes.
Why Is Roomba’s Side Brush Squeaking?
If your Roomba’s side brush is squeaking, it’s likely due to accumulated dirt, debris, or hair hindering its smooth rotation. To address this issue, power off your Roomba and disconnect it. Locate the side brush, remove it (following your Roomba’s model-specific instructions), and thoroughly clean it.
Check for any tangled hair, debris, or foreign objects wrapped around the brush. Wipe the brush and its housing with a dry cloth to ensure there’s no residual dirt causing friction. Once cleaned, reattach the side brush and restart your Roomba to see if the squeaking persists.
How To Clean The Side Brush On A Roomba
Cleaning the side brush on your Roomba is a straightforward process. First, power off and disconnect your Roomba. Locate the side brush and follow your Roomba’s model-specific instructions to remove it. Inspect the brush for tangled hair, debris, or foreign objects, and clean it thoroughly. Use a dry cloth to wipe both the brush and its housing to remove any remaining dirt.
Once cleaned, securely reattach the side brush according to your Roomba’s guidelines. After this maintenance, your Roomba’s side brush should operate smoothly without any squeaking.
Why Isn’t Roomba’s Side Brush Spinning After It’s Been Cleaned?
If your Roomba’s side brush isn’t spinning after cleaning, there are several potential causes to investigate. First, ensure that the side brush has been correctly reattached after cleaning and that there are no obstructions hindering its movement. Check for any damage to the side brush or its motor.
Additionally, inspect the brush compartment for debris that might be affecting the rotation. If the issue persists, consult your Roomba’s user manual for troubleshooting steps or consider contacting iRobot customer support for further assistance.
How Can I Clean The Rotating Brush On My Roomba?
Cleaning the rotating brush on your Roomba is a simple yet crucial maintenance task. Power off and disconnect your Roomba, then locate the rotating brush underneath the device. Depending on your Roomba model, you may need to use a coin or screwdriver to remove the brush compartment cover. Once exposed, carefully lift out the rotating brush. Remove any tangled hair, threads, or debris wrapped around the brush. Use scissors or a utility knife to cut through stubborn tangles. Clean the brush and its housing thoroughly with a dry cloth. After cleaning, securely reinsert the rotating brush, close the compartment cover, and your Roomba’s brush should operate effectively during its cleaning cycles.
Conclusion
So now you found the answer to your most asked question why is my Roomba brush not spinning?” Dealing with a non-spinning Roomba brush can be frustrating, but there are solutions. Follow the steps mentioned to fix the issue and restore efficient cleaning. Regularly clean and maintain the brushes to avoid clogs. Use a silicone-based lubricant for cleaning. Adhere to the do’s and don’ts for brush longevity. Regular inspection and replacement when needed is crucial. Proper care extends the brushes’ lifespan and ensures efficient cleaning on various floors. Troubleshoot and maintain your Roomba for optimal functionality.
FAQs
What are the common reasons for a Roomba brush not spinning?
Common reasons for a Roomba brush not spinning can include a clogged brush, a tangled brush, or a faulty motor. A faulty motor can also be the culprit, where the motor responsible for spinning the brush may be malfunctioning or burnt out.
How can I troubleshoot and fix a Roomba brush that is not spinning?
To troubleshoot and fix a Roomba brush not spinning, check for obstructions and damage, clean the brush contacts, and reset the Roomba. If the issue persists, contact Roomba customer support for further assistance.
Is there a specific type of lubricant recommended for cleaning Roomba brushes?
There is no specific type of lubricant recommended for cleaning Roomba brushes. It’s important to note that the brushes should be cleaned rather than lubricated. To clean the brushes, you can simply remove them from the Roomba, remove any hair or debris tangled around them, and then reattach them.
What are the DO’s and DON’Ts when it comes to using and maintaining Roomba brushes?
To maintain Roomba brushes effectively, regularly clean them and check for blockages, following the manufacturer’s instructions. Don’t apply excessive force, use lubricants, or pull on the brushes forcefully, as this may lead to damage or reduced performance. Adhering to these guidelines will ensure your Roomba brushes perform at their best, keeping your robot vacuum running smoothly and efficiently.
What does the Roomba side brush do?
The Roomba side brush sweeps debris from edges and corners into the path of the main brush, improving cleaning efficiency along walls and edges.
How do I get my Roomba rollers back in?
To reinstall Roomba rollers, locate the ends of the roller and insert them into the designated slots. Apply firm pressure until the rollers click into place, ensuring proper alignment for effective cleaning.
External Resources
- The Design Methodology To Develop New-Generation Universal-Motors For Vacuum Cleaners – IEEE Xplore
- The Effect Of Vacuum Cleaners On The Concentration And Particle Size Distribution Of Airborne Cat Allergen – The Journal of Allergy and Clinical Immunology
- Suck Up The Mess: The Benefits Of Using A Car Vacuum Cleaner – 91Wheels
- Design And Development Of A Low Cost Handheld Vacuum Cleaner – ResearchGate