The navigation hitch sparks a question of laser detection precision: how to fix Deebot LDS malfunction? It’s an exploration into resolving issues that impact the Laser Distance Sensor’s (LDS) functionality.
Picture this: your Deebot encountering LDS malfunctions, and the question arises. In just a couple of lines, the answer beams in like an LDS troubleshooting revelation: Start by cleaning the LDS sensor to ensure it’s free from dirt or obstructions. If the problem persists, check for any damage to the sensor or its components.
Ensure the robot is placed in a well-lit environment, as low light can affect LDS performance. Join us on this exploration for a comprehensive guide to address Deebot’s LDS-related challenges.
How Does The LDS System Work
You might be wondering, what’s this LDS system in your Deebot and why is it so important? Let’s unravel this mystery together and understand its vital role in your robotic vacuum’s operation.
LDS stands for Laser Distance Sensor, a cutting-edge technology integrated into your Deebot that helps it navigate your home with remarkable precision. It’s like the eyes of your Deebot, scanning the surroundings constantly to create a virtual map of your home.
This enables your little helper to avoid obstacles, detect drops, and efficiently clean every nook and corner of your house without any supervision.
So, how does it work exactly? The LDS system projects a laser beam that bounces off surfaces and returns to the sensor. The time it takes for the beam to return gives the Deebot an estimation of the distance to that particular object. The sensor then collates these distance measurements to create a 360-degree map of its surroundings.
Without this system, your Deebot would be like a lost child, bumping into furniture and wandering aimlessly. Therefore, it’s crucial to maintain the functionality of the LDS system to ensure your Deebot’s top-notch performance.
What Are The Common Causes Of LDS Malfunction
Let’s delve into understanding the common causes of LDS malfunction in your Deebot. You might encounter issues ranging from mechanical problems to software glitches.
Recognizing these issues can be the first step towards fixing your Deebot and ensuring it runs smoothly again.
1. Mechanical Issues
Facing mechanical issues with your Deebot LDS can be quite frustrating, but don’t worry, they’re usually pretty straightforward to fix. Mechanical issues are often related to the physical condition of your Deebot like dust accumulation, improper alignment of the LDS sensor, or even a faulty motor. These issues can be identified and resolved pretty easily if you know what to look for. Remember, regular maintenance and cleaning of your Deebot LDS can prevent many mechanical issues from happening in the first place.
To understand more about these mechanical issues, let’s take a look at the table below. It briefly explains the common mechanical issues, their symptoms, and tips on how to fix them. This information should help you diagnose and fix the problem. However, if these tips don’t resolve the issue, it’s best to contact the manufacturer or a professional service center for further assistance.
| Common Mechanical Issue | Symptoms | Tips to Fix |
| Dust Accumulation | Deebot cleans inefficiently or stops frequently | Regularly clean your Deebot LDS, especially the dustbin and brushes |
| Improper Alignment of the LDS Sensor | Deebot moves aimlessly or can’t navigate properly | Check the alignment of the LDS sensor and correct it if necessary |
| Faulty Motor | Deebot doesn’t move at all or moves very slowly | Contact the manufacturer or a professional service center |
| Damaged Wheels | Deebot moves unevenly or can’t change directions | Check the wheels for any damage and replace them if necessary |
| Blocked Brushes | Deebot can’t pick up dust or debris effectively | Regularly clean the brushes and remove any tangled hair or debris |
| Faulty Sensors | Deebot has difficulty navigating around objects or falls off edges | Clean the sensors regularly and if the problem persists, contact a professional service center |
2. Software Glitches
While mechanical issues are one aspect, software glitches in your Deebot LDS can be equally frustrating and troublesome. Sometimes, the vacuum may start behaving erratically, refusing to follow commands, or may get stuck in a loop, unable to complete its cleaning run. This could be due to bugs in the software, an outdated firmware version, or issues with the app that controls the vacuum.
The good news is, that software issues can often be resolved without having to physically tinker with the device.
The first step to fixing software glitches is to ensure that your Deebot’s firmware is up-to-date. You can do this by checking for updates on the app or on the manufacturer’s website. If an update is available, download and install it, as it could potentially fix any existing bugs.
If your vacuum is still acting up, try resetting the device to its factory settings. This can often clear any glitch or software issue that’s causing the problem. However, remember that resetting will erase all your customized settings, so you’ll have to set them up again.
Also, double-check the app for any updates or glitches, as the app controls the robot’s actions.
If none of these solutions work, you might need to contact the manufacturer for further assistance.
How To Identify LDS Malfunctions
You’ve probably noticed your Deebot vacuum behaving unusually and you’re suspecting it might be the LDS (Laser Distance Sensor) malfunctioning. The LDS is a critical component of the Deebot, responsible for mapping out your home and guiding the vacuum around obstacles. When the LDS fails, your Deebot may start bumping into things, moving in strange patterns, or failing to clean certain areas. It might also start giving error messages such as ‘LDS malfunction, please restart’ or ‘LDS requires cleaning.’
Identifying LDS malfunctions isn’t too complicated. First, observe your Deebot’s behavior. If it’s moving erratically, bumping into walls, or missing spots it usually cleans, it’s likely an LDS issue.
Second, listen for repeated error messages related to the LDS.
Lastly, manually inspect the LDS. It’s located on the top of the Deebot and looks like a small dome. If it’s clouded, scratched, or doesn’t rotate smoothly, it’s probably malfunctioning.
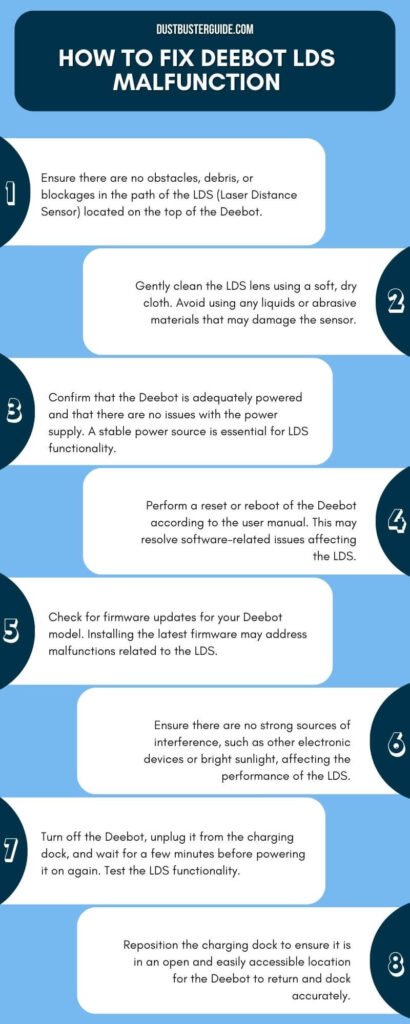
Step-By-Step Guide On How To Fix Deebot LDS Malfunction
As a Deebot owner, you might occasionally experience LDS malfunctions. Don’t worry, it’s not as daunting as it sounds.
In this guide, we’ll walk you through the process of cleaning the LDS, checking for physical damage, and performing some basic software troubleshooting to get your Deebot back on its feet.
1. Cleaning The LDS
Dirt and dust can gather in the LDS (Laser Distance Sensor) of your Deebot, often leading to malfunctions that hinder its performance. This dust accumulation is a common issue and can affect the accuracy of the sensor readings, causing your robot vacuum to move erratically or even stop functioning entirely.
To prevent this, it’s crucial to clean the LDS regularly. Failing to do so can result in persistent malfunctions that could potentially damage your device in the long run.

Cleaning the LDS is a relatively simple process that you can easily do on your own. Start by switching off your Deebot and unplugging it from the power source. Then, gently wipe the LDS using a soft, dry cloth. Avoid using wet or damp cloths as this can damage the sensor. Also, refrain from using any harsh chemicals or abrasive materials that could scratch or damage the sensor’s surface.
Once the LDS is clean, you can plug your Deebot back in and switch it on. With a clean LDS, your Deebot should function more efficiently, reducing the chances of experiencing an LDS malfunction.
2. Checking For Physical Damage
After ensuring that your Deebot’s LDS is clean and free of dust, the next step in fixing its malfunction is to check for physical damage. It’s possible that your robot vacuum has sustained some form of physical damage which may be causing the LDS malfunction.
When checking for physical damage, focus primarily on the LDS and its surrounding area. Look out for any visible signs of damage such as cracks, dents, or loose parts. If there are any, it’s likely that they are the cause of the LDS malfunction. Note that in some cases, the damage may not be visible and may require a professional inspection.
Now, let’s look at a quick guide on what to check when inspecting your Deebot for physical damage:
| Area to Inspect | What to Look For |
| LDS Sensor | Cracks, dents, or loose parts |
| Surrounding Areas | Any signs of physical damage that could affect the LDS |
| Wiring to LDS | Loose or frayed wires |
| Internal Parts (if accessible) | Damaged or misaligned parts that could affect the LDS |
3. Software Troubleshooting
So, you’ve checked for dust and physical damage, but what if your robot vacuum isn’t working as it should? It’s time to dive into some software troubleshooting.
The first step in this process is to reset the Deebot. Don’t worry, it’s a simple process. All you need to do is locate the reset button, usually hidden under a small hole on the side of the robot. Use a pin or thin tool to press and hold this button for a few seconds until your Deebot beeps, indicating it’s been reset.
Restart it and check if the problem persists.
If your Deebot is still malfunctioning, it might be due to outdated software. Just like your phone or computer, robot vacuums also need timely updates for optimal performance.
Check if there are any available updates for your Deebot through the companion app. If there’s an update, download it and install it. This might take some time, but it’s a necessary step.
Once the update is complete, restart your Deebot and see if the LDS malfunction has been resolved.
Fix Ecovacs Deebot 900, 901 ( Deebot De50, DE53 ) LDS Malfunction
When To Contact Customer Support
Sometimes, despite your best efforts, your Deebot’s LDS malfunction may persist, indicating it’s time to seek help from customer support. Keep in mind that you don’t have to feel defeated if the issue remains unresolved after your troubleshooting attempts.
An LDS malfunction can stem from more complex internal problems that only trained professionals can diagnose and fix. Contacting customer support can provide you with expert advice and guidance on how to fix the LDS malfunction.
The customer support team at Deebot is well-versed in handling such issues and can guide you through more advanced troubleshooting steps. They can also determine if your Deebot requires professional repair or replacement, ensuring the longevity and efficiency of your device.

Preventive Measures For Future LDS Malfunctions
Taking care of your Deebot shouldn’t be a hassle, but it should be a routine. Just like any other electronic device, regular maintenance, and proper usage are key to preventing LDS malfunctions.
Let’s dive in and learn what you can do to keep your Deebot functioning optimally, reducing the chances of future problems.
1. Regular Maintenance
Just like your car, your Deebot LDS robot vacuum also needs regular maintenance to keep it running smoothly and efficiently. It’s not always about fixing a malfunction when it occurs; sometimes, it’s about preventing the malfunction from happening in the first place. Regular maintenance checks can help identify potential issues before they become a major problem, and they can also extend the lifespan of your Deebot LDS.
Here’s a simple table to help you keep track of the maintenance tasks and their recommended frequency.
| Maintenance Task | Why It’s Important | Recommended Frequency |
| Clean sensors | Prevents errors and improves navigation | Once a week |
| Check and replace the filter | Prevents clogs and improves cleaning efficiency | After each use |
| Empty dustbin | Prevents overflow and maintains suction power | After each use |
| Check and replace filter | Ensures optimal air quality | Every 2 months |
2. Using The Deebot Properly
While regular maintenance of your Deebot is crucial, it’s equally important to use the device properly to prevent any malfunction. Misuse or mishandling can often lead to issues such as the LDS (Laser Distance Sensor) malfunction, which can significantly affect the device’s performance.
So, let’s delve into some valuable tips on using the Deebot properly, and how it can help prevent the LDS malfunction.
Firstly, make sure to place the Deebot on a flat surface; uneven surfaces can cause the LDS to give incorrect readings, resulting in the robot getting stuck or moving in random patterns.

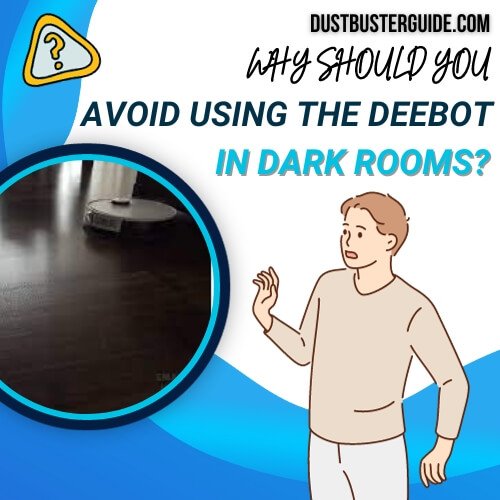
Avoid using the Deebot in dark rooms as the LDS may not function optimally. Also, keep the device away from reflective surfaces as they can interfere with the LDS signals, causing erroneous navigation.
Moreover, remember not to manually move the Deebot while it’s running; this can confuse its navigation system, leading to potential LDS issues.
Following these simple but effective tips can significantly reduce the chances of an LDS malfunction, ensuring your Deebot provides efficient and reliable service.
Why Is My Deebot Not Mapping Correctly
If your Deebot is not mapping correctly, there are several potential reasons and solutions to consider.
- First, ensure that the charging dock is properly positioned against the wall, free from obstacles, and placed in a central location within your house to aid in mapping.
- Additionally, avoid moving the Deebot during the mapping process, as this can lead to skewed or incomplete maps.
- It’s also important to check for strong direct light, reflective objects, and dark floors, as these can cause issues during mapping.
- If the map is confusing or skewed, you can try deleting any existing maps in the app and then remapping the area.
- Finally, if the Deebot is unable to finish mapping due to a very large surface area, consider enabling the Continuous Clean function or contacting Ecovacs Customer Service for further assistance.
By addressing these factors, you can help ensure that your Deebot maps your home accurately and effectively.
Conclusion
So now you know how to fix Deebot LDS malfunction. Keeping your Deebot functioning optimally is essential for a clean and tidy home. Understanding the LDS system, identifying common causes and signs of malfunction, and knowing how to troubleshoot can help you fix any issues promptly.
Remember, if you can’t resolve the LDS malfunction yourself, don’t hesitate to reach out to customer support. Taking preventive measures can also help avoid future malfunctions, ensuring your Deebot continues to serve you well.
FAQ
What are the key features of the Deebot LDS system?
Your Deebot LDS system boasts some impressive features. It uses laser distance sensors for precise navigation, creates detailed maps for efficient cleaning, and even detects obstacles, ensuring your robot vacuum avoids collisions and falls.
Are there any specific cleaning practices to be followed for the Deebot LDS system?
Yes, there are specific cleaning practices for your Deebot LDS system. Regularly clean the sensors, ensure the robot is switched off before cleaning, and avoid using wet clothes or liquids on the system.
What is the average lifespan of a Deebot LDS unit?
The average lifespan of a Deebot LDS unit depends on how well you maintain it. Generally, with proper care and regular maintenance, it can last around 3 to 5 years.
Can software updates impact the functioning of the Deebot LDS system?
Yes, software updates can impact your Deebot LDS system’s functioning. They often bring improvements, but sometimes they may cause glitches. If you’re facing issues post-update, consider reverting to the previous version or seeking professional help.
Are there any warning signs prior to a complete Deebot LDS malfunction?
Yes, there are warning signs before a complete Deebot LDS malfunction. You might notice erratic movements, failure to navigate properly, or repeated error messages. These could indicate an impending malfunction in the LDS system.
Where is the DEEBOT laser distance sensor?
The DEEBOT laser distance sensor is located on the top of the robot, and it is responsible for mapping and navigating the cleaning area.
Why does my DEEBOT keep stopping and blinking red?
If your DEEBOT keeps stopping and blinking red, it could indicate a low battery, a problem with the robot, or a dirty sensor. Check the battery level, clean the sensors, and ensure that the robot is not blocked by obstacles or stuck in a tight space.
External Resources
- Vacuum Cleaner Noise Annoyance: An Investigation Of Psychoacoustic Parameters, Effect Of Test Methodology, And Interaction Effect Between Loudness And Sharpness – MDPI
- Design And Development Of Automatic Cleaning And Mopping Robot – Institute of Physics
- Comparing The Recommendations Of Buyers Of Energy-Efficient And Inefficient Vacuum Cleaners – MDPI
- The Best Robot Vacuum You Can Buy Right Now – The Verge

