The technological choreography of your Shark robot vacuum encounters a glitch, prompting the question: how to repair Shark robot vacuum? It’s a troubleshooting dance, ensuring your cleaning companion resumes its suction symphony.
Picture this: your diligent Shark vacuum signaling an issue, and the question arises. In just a couple of lines, the answer pirouettes are like a troubleshooting revelation: Check for clogs, clean the brushes, and ensure software updates are in order to address potential issues.
But before you assume it’s a technical tango, join us on this exploration. We’ll guide you through the steps to bring your Shark robot vacuum back to its efficient cleaning routine.
What Are The Most Common Problems With Shark Robot Vacuums
Having trouble with your Shark robot vacuum? Let’s dive into some common problems you might encounter and learn how to fix them!
One common issue that you may face with your Shark robot vacuum is that it’s not picking up dirt or debris effectively. If you notice that the vacuum is leaving behind dirt or not cleaning as it should, the problem may lie with the brushes. Over time, the brushes can become clogged with hair, dust, and other debris, which hinders their ability to effectively pick up dirt.
To fix this, turn off the vacuum and remove any tangled hair or debris from the brushes. You can use a pair of scissors or a brush to gently remove the tangled material. Once the brushes are clean, you can reattach them and try running the vacuum again to see if the problem is resolved.
Another common issue is that the Shark robot vacuum may get stuck or have difficulty navigating around obstacles. If you find that your vacuum is constantly getting stuck or is unable to move freely, check the wheels for any obstructions. Sometimes, small objects like socks or cords can get tangled around the wheels, preventing them from turning properly. Remove any obstacles you find and make sure the wheels are spinning freely.
Additionally, ensure that the area where the vacuum operates is clear of any large or heavy objects that may obstruct its movement. By keeping the wheels clean and the operating area clear, you can help your Shark robot vacuum navigate smoothly and efficiently.
How To Repair Shark Robot Vacuum
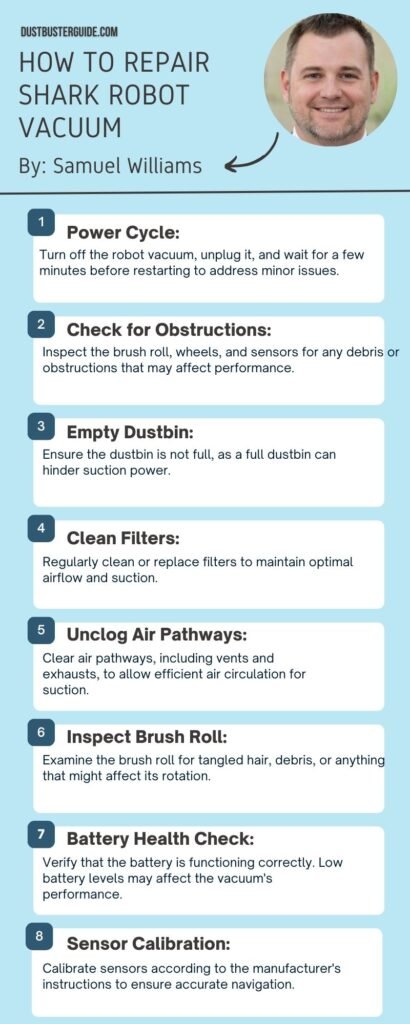
Now that we’re familiar with the common challenges that a shark robot vacuum might encounter, let’s explore how to effectively tackle the repair process. Below, you’ll find some of the most effective strategies to repair and enhance the performance of your shark robot vacuum.
Cleaning The Brush And Filter For Improved Performance
To enhance the performance of your Shark robot vacuum, start by cleaning the brush and filter regularly. Over time, the brush and filter can get clogged with dirt, hair, and debris, which can affect the vacuum’s suction power and overall efficiency. Cleaning these components is a simple yet effective way to ensure your vacuum continues to work at its best.
To clean the brush, first, turn off the vacuum and unplug it from the power source. Locate the brush underneath the vacuum and remove any visible debris or tangled hair. Use a pair of scissors or a brush cleaning tool to carefully cut or remove any hair that’s wrapped around the brush. Once the brush is free from debris, rinse it under running water to remove any remaining dirt or dust. Make sure the brush is completely dry before placing it back into the vacuum.
Next, it’s time to clean the filter. The filter is responsible for trapping fine particles and preventing them from recirculating into the air. Regular cleaning of the filter will not only improve the vacuum’s performance but also ensure cleaner air in your home.
To clean the filter, remove it from the vacuum and tap it gently to remove any loose dirt or debris. You can also use a soft brush or a vacuum cleaner attachment to remove stubborn dust. If the filter is washable, rinse it under running water until the water runs clear. Allow the filter to air dry completely before reinstalling it into the vacuum.
By regularly cleaning the brush and filter of your Shark robot vacuum, you can ensure that it continues to provide optimal performance. Remember to check the manufacturer’s instructions for specific cleaning recommendations and frequency. With a clean brush and filter, your vacuum will be able to effectively tackle dirt and debris, leaving your floors spotless.
Replacing The Battery For Proper Charging
When it comes to maintaining optimal charging performance for your Shark robot vacuum, replacing the battery is essential. Over time, the battery of your vacuum may start to wear out, resulting in reduced suction power and shorter cleaning times.
By replacing the battery, you can ensure that your vacuum is able to charge properly and provide efficient cleaning for your home.
To replace the battery of your Shark robot vacuum, first, make sure the vacuum is turned off and unplugged from the charging dock.
Locate the battery compartment on the underside of the vacuum and remove the screws or clips that secure it in place.
Carefully take out the old battery and dispose of it properly according to local regulations. Then, insert the new battery into the compartment, making sure it is securely in place. Finally, reattach the screws or clips to secure the battery compartment, and your Shark robot vacuum is ready for use again.
Replacing the battery of your Shark robot vacuum is a simple process that can greatly improve its charging performance. By following these steps, you can ensure that your vacuum is always ready to tackle the cleaning tasks in your home.
Remember to refer to the user manual for specific instructions and safety precautions before replacing the battery. With a new battery, your Shark robot vacuum will be able to maintain optimal charging and provide efficient cleaning for a long time to come.
Pros And Cons Of Replacing The Battery
Troubleshooting Issues With Navigation And Movement

Experiencing issues with the navigation and movement of your Shark robot vacuum can be frustrating and disrupt your cleaning routine. However, there are a few troubleshooting steps you can take to address these problems and get your robot vacuum back on track.
First, make sure that the sensors on your Shark robot vacuum are clean and free from any obstructions. Dust, dirt, or debris can interfere with the sensors’ ability to detect obstacles and navigate your home effectively. Use a soft, dry cloth to gently clean the sensors and remove any buildup that may be affecting their performance.
Next, check the wheels of your robot vacuum. If they’re clogged with hair, strings, or other debris, they may not be able to move freely and navigate your home properly. Remove any obstructions from the wheels and ensure that they’re able to rotate smoothly.
If your Shark robot vacuum is still experiencing navigation issues, it may be helpful to reset its mapping and navigation system. Refer to the user manual or manufacturer’s website for instructions on how to perform a reset. This can often resolve any software glitches or errors that may be causing the navigation problems.
Troubleshooting issues with the navigation and movement of your Shark robot vacuum can be done by cleaning the sensors, checking the wheels for obstructions, and resetting the mapping and navigation system if necessary. By following these steps, you can address common problems and get your robot vacuum back to efficiently clean your home.
Fixing Connectivity Problems With The Shark Robot Vacuum
Having trouble connecting your Shark robot vacuum? Don’t worry, we’ve got a solution for you!
Connectivity problems can be frustrating, but with a few simple steps, you can get your robot vacuum up and running again.
- First, make sure that your Wi-Fi network is working properly. Check if other devices in your home are able to connect to the internet. If they can’t, you may need to reset your router or contact your internet service provider for assistance. Once your Wi-Fi is working correctly, move on to the next step.
- Next, check the signal strength of your Wi-Fi network in the area where your Shark robot vacuum is located. Weak Wi-Fi signals can cause connectivity issues. To improve the signal strength, try moving your router closer to the vacuum or removing any obstructions that may be blocking the signal. You can also try using a Wi-Fi extender or a mesh network system to improve coverage throughout your home.
- If the signal strength is not the issue, try restarting both your Shark robot vacuum and your smartphone or tablet. Sometimes, a simple restart can resolve connectivity problems. After restarting, open the SharkClean app on your mobile device and follow the instructions to reconnect your robot vacuum to your Wi-Fi network.
- If you’re still experiencing connectivity issues, try resetting your Shark robot vacuum to its factory settings. To do this, locate the reset button on the back or bottom of the vacuum and press and hold it for about 10 seconds. This will erase any stored Wi-Fi information and allow you to set up the vacuum as if it were brand new. Follow the initial setup instructions in the SharkClean app to reconnect the vacuum to your Wi-Fi network.
By following these steps, you should be able to fix any connectivity problems with your Shark robot vacuum. Remember to always check your Wi-Fi network, improve signal strength if needed, restart your devices, and reset the vacuum if necessary.
Maintaining And Cleaning The Sensors For Optimal Functionality
To ensure optimal functionality, it’s crucial to regularly maintain and clean the sensors of your Shark robot vacuum. The sensors play a vital role in navigating your vacuum around your home and avoiding obstacles. Over time, dust, dirt, and debris can accumulate on the sensors, which can hinder their performance.
To clean the sensors, start by turning off the vacuum and unplugging it from the power source. Gently wipe the sensors with a soft, dry cloth to remove any dirt or dust. Avoid using liquids or harsh cleaning agents as they may damage the sensors. Regularly cleaning the sensors will help maintain their accuracy and ensure your Shark robot vacuum continues to operate efficiently.
In addition to cleaning the sensors, it’s important to regularly check for any physical damage. Accidental bumps or falls can sometimes cause the sensors to become misaligned or damaged. Inspect the sensors visually to ensure they are in proper working condition. If you notice any cracks or other signs of damage, contact Shark customer support for assistance with repairs or replacement.
Proper maintenance and care of the sensors will prolong the lifespan of your Shark robot vacuum and help it perform at its best. By taking the time to clean and inspect the sensors regularly, you can ensure that your vacuum continues to navigate your home with ease and efficiency.
What Are The Different Error Codes In Shark Robots And How To Resolve Them
Now that you’ve learned about maintaining and cleaning the sensors of your Shark robot vacuum, let’s move on to another important aspect of troubleshooting and repairing it: understanding error codes and how to resolve them.
Your Shark robot vacuum is designed to detect and diagnose any issues it may encounter during operation. When an error occurs, it displays a specific error code on its display screen or through indicator lights. By understanding these error codes, you can quickly identify the problem and take the necessary steps to resolve it.
When you encounter an error code on your Shark robot vacuum, it’s crucial to refer to the user manual that came with the device. The manual provides a comprehensive list of error codes and their corresponding explanations. Each error code represents a specific issue, such as a clogged brush roll, a full dustbin, or a malfunctioning sensor. By knowing what each code means, you can troubleshoot and fix the problem efficiently.
To resolve an error code, start by turning off the robot vacuum and unplugging it from the power source. Give it a few minutes to cool down before proceeding. Next, check the user manual for the error code you encountered and follow the suggested troubleshooting steps provided.
The manual may instruct you to clean specific parts, replace a component, or reset the device. Follow the instructions carefully, and if necessary, consult the manufacturer’s customer support for further assistance.
By addressing the error code promptly, you can ensure that your Shark robot vacuum continues to function optimally and efficiently for years to come.
Remember, understanding error codes and how to resolve them is essential for maintaining the performance of your Shark robot vacuum. By being proactive in addressing any issues that arise, you can keep your vacuum running smoothly and prolong its lifespan.
How To Replace Shark Robot Vacuum Wheels Correctly
Replacing the wheels on a Shark robot vacuum can be a straightforward process if you follow the manufacturer’s instructions or video tutorials.
The first step is to turn off the vacuum to prevent any accidents or damage during the process. Depending on the specific model, you may need to remove screws to access the wheels.
Once you have access to the wheels, carefully remove the old wheels and replace them with the new ones, following the specific instructions for your model.
There are several YouTube videos available that demonstrate the process of removing and replacing wheels on Shark Ion Robot vacuums, providing visual guidance for the process.
Conclusion
So now you know how to repair Shark robot vacuum. Repairing your Shark robot vacuum is manageable by following the outlined steps. Regularly clean the brush and filter, replace the battery as needed, and troubleshoot navigation and connectivity issues. Maintenance of sensors is vital for optimal functionality. Understanding error codes aids in quick issue resolution. By adhering to these steps, you can restore your Shark robot vacuum’s performance efficiently and confidently.
FAQs
How often should I clean the brush and filter of my Shark robot vacuum?
You should clean the brush and filter of your Shark robot vacuum at least once a month to ensure optimal performance. Regular maintenance will prevent clogs and prolong the lifespan of your vacuum.
Can I use a different brand of battery to replace the old one in my Shark robot vacuum?
Yes, you can use a different brand of battery to replace the old one in your Shark robot vacuum. Just make sure the new battery has the same specifications as the original one to ensure compatibility and optimal performance.
Why is my Shark robot vacuum getting stuck in certain areas of my home?
Is your shark robot vacuum getting stuck in certain areas of your home? This could be due to various reasons such as tangled brushes, low battery, or obstacles in its path. Let’s explore some troubleshooting steps to fix this issue.
How can I fix connectivity problems between my Shark robot vacuum and the app?
How to Fix Connectivity Problems Between Your Shark Robot Vacuum and the App: Follow these steps to troubleshoot connectivity issues: 1) Ensure your Wi-Fi is working properly. 2) Check if the app and vacuum are on the latest software versions. 3) Restart both devices.
What do the different error codes on my Shark robot vacuum mean, and how can I fix them?
Different error codes on your Shark robot vacuum indicate specific problems. Understanding these codes can help you troubleshoot and fix the issues. Let’s explore some common error codes and their possible solutions to get your vacuum back up and running efficiently.
Why does my Shark robot stop working?
The Shark robot vacuum may stop working due to various reasons, such as a clogged main brush roller, low battery power, faulty sensors, or a depleted battery.
What is Shark Robot vacuum error 4?
Error 4 on the Shark robot vacuum may indicate an issue with the BotBoundary sensors. Troubleshooting steps such as cleaning, sensor testing, firmware verification, and potential servicing may be necessary to address these issues.
External Resources
- Typical Household Vacuum Cleaners: The Collection Efficiency And Emissions Characteristics For Fine Particles – Taylor & Francis Online
- Industrial Vacuums Cleaners Market Key Insights And Industry Outlook 2023 – Glasgow West End Today
- Robot Vacuum Cleaner Personality And Behavior – Springer Link
- Consumer Buying Behaviour Of Sustainable Vacuum Cleaners – Consequences For Design And Marketing – ScienceDirect