The navigational choreography of your Roomba requires a spatial arrangement, prompting the question: how do you set up rooms for Roomba? It’s an exploration into optimizing your cleaning companion’s efficiency.
Picture this: your diligent Roomba is ready to embark on a cleaning journey, and the question arises. In just a couple of lines, the answer glides in like a room-setup revelation: use physical barriers like virtual walls or the Roomba app to define cleaning zones.
But before you assume it’s a complex arrangement, join us in this exploration. We’ll guide you through the setup steps, ensuring your Roomba navigates your space with precision.
How Do You Set Up Rooms For Roomba: Step-By-Step
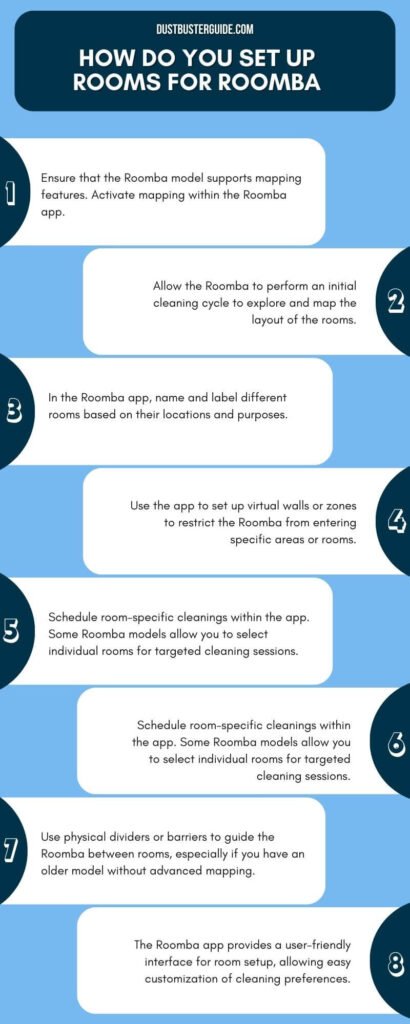
To set up rooms for your Roomba we have some important steps for you to take. Let’s see below what those are.
1. Clearing The Path For Your Roomba
Ensure a seamless cleaning experience for your Roomba by creating a clutter-free path in your home. Before you start cleaning, take a few minutes to clear any obstacles that may hinder your Roomba’s movement.
Pick up any toys, shoes, or other items that may be scattered on the floor. Don’t forget to check for loose cords or cables that could get tangled in the Roomba’s brushes.
By removing these obstacles, you are not only helping your Roomba clean effectively but also preventing any potential damage to your belongings or the Roomba itself.
Creating a clutter-free path also means paying attention to furniture placement. Make sure that chairs, tables, and other bulky items are arranged in a way that allows your Roomba to navigate easily around them.
2. Creating Virtual Boundaries For Your Roomba
By creating virtual boundaries, your Roomba can navigate around delicate items or areas that you want to keep off-limits, ensuring a seamless cleaning experience.
Virtual boundaries are like invisible walls that you can set up using your Roomba’s smartphone app. These boundaries can be placed anywhere in your home to prevent your Roomba from entering specific areas.
To create virtual boundaries, simply open the Roomba app on your smartphone and select the option to set up virtual boundaries. You can then draw lines or shapes on the map of your home to indicate the areas you want your Roomba to avoid.
For example, if you have a delicate vase on a table, you can draw a boundary around it to prevent your Roomba from accidentally knocking it over. Similarly, if there are certain rooms or areas that you want to keep off-limits, you can draw boundaries around them to ensure your Roomba stays out.
Once you have set up the virtual boundaries, your Roomba will use them as reference points to navigate around your home. It will recognize these boundaries and adjust its cleaning path accordingly, avoiding any obstacles or restricted areas.
This feature not only protects your valuable items but also gives you peace of mind, knowing that your Roomba will clean your home without causing any damage. So go ahead, set up those virtual boundaries, and let your Roomba do its magic while keeping your delicate items safe.
Pros And Cons Of Creating Virtual Boundaries For Your Roomba
3. Designing Roomba-Friendly Spaces
Get creative with your home layout and create spaces that are perfect for your Roomba’s navigation. When designing Roomba-friendly spaces, there are a few key factors to consider.
- First, make sure there is enough open floor space for the Roomba to maneuver around without getting stuck. Move any furniture or objects that could potentially obstruct its path. Additionally, try to minimize clutter and keep the floor clear of any small items that the Roomba could accidentally pick up or get tangled in.
- Another important aspect of designing Roomba-friendly spaces is creating clear pathways for the Roomba to follow. This can be done by strategically placing furniture and objects to guide the Roomba along a specific route.
- You can also use virtual walls or magnetic strips to create boundaries that the Roomba should not cross. By setting up these boundaries, you can prevent the Roomba from entering certain areas or getting stuck in tight corners.
- Lastly, consider the height of furniture and other objects in the room. Make sure that the Roomba can easily navigate underneath low-lying furniture or around tall obstacles.
By taking these factors into account, you can design rooms that are optimized for your Roomba’s navigation and ensure a more efficient cleaning process.
| Factor | Considerations |
| Open Space | Clear out furniture and objects |
| Clutter | Minimize small items on the floor |
| Pathways | Strategically place furniture |
| Boundaries | Use virtual walls or magnetic strips |
| Height | Ensure easy navigation for Roomba by removing low-hanging obstacles or adjusting furniture heights. |
How Can You Personalize Your Roomba’s Cleaning Schedule
Make your life easier by personalizing your Roomba’s schedule and choosing the perfect cleaning times and modes for your home.
With the ability to set cleaning times, you can ensure that your Roomba cleans when it’s most convenient for you. Whether you prefer it to clean while you’re at work or during the night while you sleep, you can easily program your Roomba to start and stop at specific times.
This way, you can come home to a freshly cleaned floor or wake up to a tidy living space without lifting a finger.
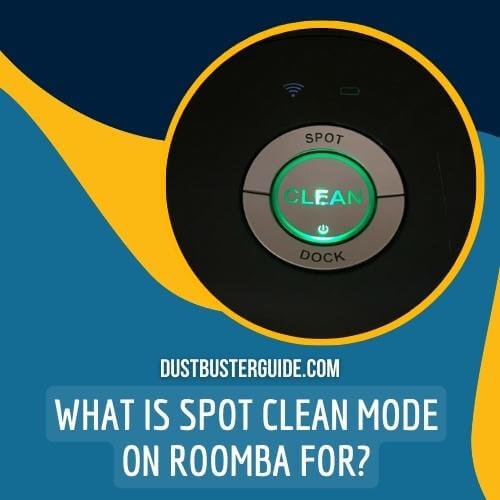
In addition to setting cleaning times, you can also choose different cleaning modes to suit your specific needs. For example, if you have a particularly dirty area, you can select the ‘Spot Clean’ mode, which directs the Roomba to focus on a small, concentrated area for a more thorough cleaning.
On the other hand, if you just need a general cleaning, you can choose the ‘Clean’ mode, which allows the Roomba to navigate the entire room.
By personalizing your Roomba’s schedule and selecting the appropriate cleaning mode, you can ensure that your floors are always clean and fresh with minimal effort on your part.
How Does Roomba’s Navigation System Adapt To Different Room Setups
When adapting the room setup for different Roomba models, there are a few key points to consider.
Model-Specific Features
To optimize cleaning efficiency, Roomba’s model-specific features can transform rooms into spotless sanctuaries. With these advanced features, you can expect a thorough and precise cleaning experience tailored to your specific Roomba model.
Here are four model-specific features that can help you set up your rooms for the Roomba:
1. Custom Cleaning Preferences: Depending on the model, you can customize your Roomba’s cleaning preferences to suit your needs. You can set up cleaning schedules, specify certain areas to avoid, or even create virtual boundaries using the Roomba app. This allows you to have complete control over how your Roomba cleans each room.
2. Advanced Navigation Systems: Different Roomba models come equipped with advanced navigation systems like iAdapt or vSLAM. These systems use sensors and cameras to map out your rooms and efficiently navigate around obstacles. By understanding the layout of the room, your Roomba can clean more effectively and avoid getting stuck.
3. Dirt Detect Technology: Many Roomba models feature dirt detect technology that uses acoustic and optical sensors to detect areas with high dirt concentrations. When the Roomba detects these areas, it will focus on them and spend more time cleaning them thoroughly. This ensures that even the dirtiest spots in your room are given extra attention and are left sparkling clean.
4. Automatic Carpet Boost: Some Roomba models are equipped with automatic carpet boost technology. This feature detects when the Roomba is on a carpeted surface and increases the suction power to provide a deeper clean. By automatically adjusting its performance based on the surface, the Roomba can effectively clean both hard floors and carpets without any manual intervention.
By taking advantage of these model-specific features, you can create an ideal environment for your Roomba to work its magic. Whether it’s customizing cleaning preferences, utilizing advanced navigation systems, benefiting from dirt detect technology, or enjoying an automatic carpet boost, your Roomba will transform your rooms into impeccably clean spaces with minimal effort on your part.
Adjusting Setup Steps
Now that you know about the model-specific features of your Roomba, let’s talk about adjusting the setup steps to ensure your rooms are perfectly prepared.
- First and foremost, it’s important to clear any clutter or obstacles from the floor. Pick up any small items, toys, or wires that may hinder the Roomba’s movement.
- Next, take a look at the room’s layout and decide if there are any areas where you don’t want the Roomba to go. You can use virtual walls or barriers to block off those spaces and keep the Roomba confined to the desired areas.
- Additionally, if there are any low-hanging curtains or drapes, make sure they’re lifted or secured to prevent the Roomba from getting entangled.
- After adjusting the setup according to your specific needs, it’s time to make sure the Roomba’s docking station is easily accessible. The docking station is where the Roomba returns to recharge after completing its cleaning cycle. Place it in a central location that’s free from any obstructions. Ideally, it should be placed against a wall with at least three feet of clearance on either side. This will allow the Roomba to approach and dock without any issues.
- Lastly, ensure that the power cord is properly plugged in and the docking station is connected to a power source. By following these adjustments to the setup steps, you’ll be ready to let your Roomba autonomously clean your rooms, making your life a whole lot easier!
How To Setup Your New iRobot Roomba
Tips For Efficient Roomba Cleaning
Efficiently cleaning with a Roomba involves a combination of preparation, maintenance, and optimization. Here are some tips to help you get the most out of your Roomba:
- Set Regular Cleaning Schedules: Depending on your household’s needs, set a regular cleaning schedule for the Roomba to run automatically. This maintains a consistently clean space.
- Empty the Dustbin: Regularly empty the Roomba’s dustbin after each cleaning cycle. An overloaded dustbin can hinder its cleaning efficiency.
- Clean Brushes and Filters: Check and clean the brushes, bristle rollers, and filters according to the manufacturer’s recommendations. Clogged brushes and filters reduce cleaning performance.
- Inspect Wheels and Sensors: Ensure the wheels and sensors are clean and functioning properly. Dirty wheels might affect movement, and blocked sensors can prevent efficient navigation.
- Layout Awareness: Roombas work by bumping into obstacles and changing direction. Rearrange furniture or objects that might cause the Roomba to get stuck or trapped repeatedly.
- Use “Spot” Cleaning: If there’s a particularly dirty area, use the Roomba’s “Spot” cleaning mode to focus on that spot for more intensive cleaning.
- Carpet Boost (if applicable): If your Roomba has carpet boost mode, enable it when cleaning carpets to ensure thorough cleaning.
- Adjust Suction (if applicable): Some models allow you to adjust suction power. Lower the suction on hard floors and increase it on carpets for optimal cleaning results.
- Monitor Performance: Periodically assess how well the Roomba is cleaning. If you notice areas consistently missed or cleaning patterns that aren’t efficient, consider making adjustments.
- Stay Updated: Keep your Roomba’s firmware updated. Manufacturers often release updates that can improve cleaning algorithms and overall performance.
Why Roomba Missed A Room When Mapping, What Are The Reasons And How To Fix It
When a Roomba misses a room during mapping, there could be several reasons for this issue. Some common reasons and solutions include:
- Obstructions: Ensure that the room is not obstructed by any objects or furniture, which might prevent the Roomba from entering the room. Remove any obstacles and try again.
- Insufficient mapping runs: Some Roomba models may require multiple mapping runs to accurately map a room. Depending on the model, you can check the app settings to ensure that the Roomba is set to map all rooms. For example, the Roomba i7, i3, and 960 models offer Smart Mapping, which can learn the layout of up to 10 different floor plans.
- Low lighting: The Roomba’s camera needs proper lighting to view the room it’s in. Ensure that the lights are on or at an adequate level for the camera to function effectively.
- Dirty sensors: Clean the sensors and brushes regularly to ensure optimal navigation and mapping performance. This can help prevent missed rooms and spots during cleaning.
App settings: Check the app settings to ensure that they are not accidentally set to clean only certain rooms. Adjust the settings as needed to ensure a thorough cleaning of all rooms.
Conclusion
So now you know how do you set up rooms for Roomba. Setting up rooms for your Roomba can greatly improve its efficiency and effectiveness in cleaning. By following the tips mentioned in this article, you can ensure that your Roomba is able to navigate and clean your home with ease.
Additionally, regular maintenance and cleaning of your Roomba will help to maintain its optimal performance over time. So, take the time to set up your rooms properly and keep your Roomba in top shape for a clean and tidy home.
FAQs
Are there any specific room setup requirements for different models of Roomba?
Different models of Roomba have different room setup requirements. Some may require virtual walls or beacons to create boundaries, while others have mapping capabilities to navigate and clean multiple rooms.
What are some tips for maintaining the optimal performance of Roomba?
To maintain the optimal performance of your Roomba, regularly clean its brushes and filters, empty the bin, and keep it charged. Also, clear any obstacles in the cleaning area and avoid loose cords.
Can I personalize the cleaning schedule of my Roomba?
Yes, you can personalize the cleaning schedule of your Roomba. Use the iRobot Home app to set specific days and times for your Roomba to clean. It’s a convenient feature that allows you to customize your cleaning routine.
How do I choose different cleaning modes for my Roomba?
To choose different cleaning modes for your Roomba, simply navigate to the settings on the device or the mobile app. From there, you can select the desired mode for your Roomba to clean your home.
Are there any additional maintenance tasks I should perform to ensure efficient cleaning with Roomba?
Performing additional maintenance tasks can ensure efficient cleaning with Roomba. Regularly clean the brushes, empty the bin, and check for any obstructions. Also, schedule periodic maintenance like replacing the filter and checking the wheels for debris.
How do I name my rooms for Roomba?
To name your rooms for Roomba, follow these steps:
- Open the iRobot app and select your Roomba.
- Tap the “Clean” button.
- Tap the “Customize” button.
- Tap “Edit” next to “Room Names”.
- Enter the name of the room and tap “Save”.
How do you prepare a room for a robot vacuum?
To prepare a room for a robot vacuum, follow these steps:
- Clear the room of any small objects or debris that may obstruct the vacuum’s path.
- Tidy up any cords or cables that may get tangled in the vacuum.
- Remove any water hazards, such as open containers or spills.
- If you have plush rugs or mats, consider removing them or securing them to the floor to prevent the vacuum from getting stuck.
External Resources
- Life Cycle Environmental Impacts Of Vacuum Cleaners And The Effects Of European Regulation – ScienceDirect
- Dyson Moves Into The Robot Market – 9News
- Control Strategies For Cleaning Robots In Domestic Applications: A Comprehensive Review – GitHub Pages
- Design And Manufacturing Of Automatic Classroom Vacuum Cleaning Robot – IJERT