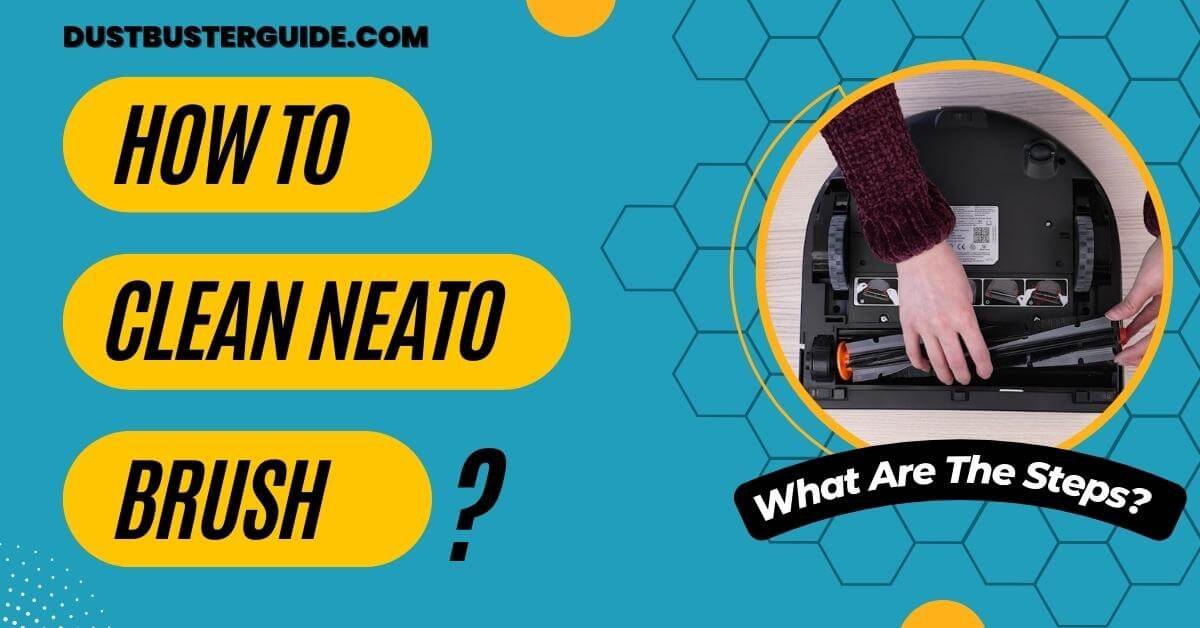
Ever wondered about maintaining the peak performance of your Neato vacuum and thought about how to clean Neato brush? Embark on a quick and informative journey into the world of brush maintenance.
Imagine a few simple steps: 1. Remove the brush. 2. Clear tangled debris. 3. Clean with a brush or vacuum. Join us for this concise exploration, guiding you through the process.
Clean your Neato brush effortlessly by following these easy steps, ensuring your vacuum continues to deliver optimal cleaning performance.
How To Clean Neato Brush – Steps Explained
A clean brush ensures optimal performance, helping your Neato do its job of keeping your home spotless. So let’s move on to the important steps that would lead us to clean our neato brush. Let’s see what are these steps.
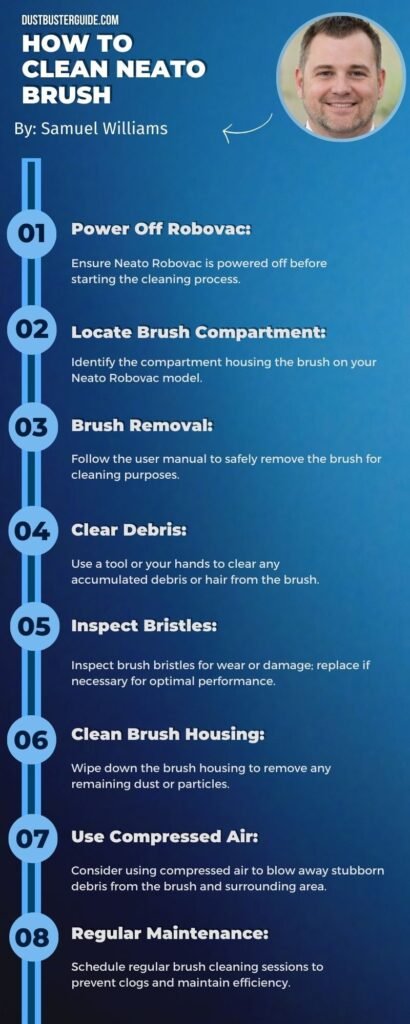
1. Gather Necessary Cleaning Tools
Before you get started on giving your Neato brush a thorough clean, let’s gather all the necessary tools you’ll need to make the job easier and more efficient.
A clean and well-maintained Neato brush will not only extend its lifespan but will also contribute to the overall performance of your Neato vacuum cleaner. To achieve this, you’ll require a few basic cleaning tools.
These include a pair of scissors or a brush cleaning tool, a cloth, and a mild soap solution.
To begin with, scissors or a brush cleaning tool are crucial for removing hair, string, or any other debris that may be entangled in the brush.
A cloth, on the other hand, is useful for wiping off the dust and dirt from the brush and other adjacent parts.
Lastly, a mild soap solution comes in handy for a deep clean, which is especially important if you have pets or a high-traffic area in your home that accumulates a lot of dirt.
Remember, using harsh chemicals could potentially damage your Neato brush, so stick to mild soap solutions.
Now that you’ve gathered your tools, you’re all set to start the cleaning process.
2. Uninstall The Neato Brush
Alright, let’s dive right into how you can uninstall your robotic vacuum roller. First, make sure your Neato vacuum is powered off and disconnected from any power source to avoid any potential accidents.
Then, flip it over to expose the underside where the brush is located. You should see a brush guard which is held in place by screws. Use a small Phillips screwdriver to unscrew these.
Once the guard is removed, you should be able to easily lift out the brush.
Now that the brush is exposed, gently pull it towards you while holding the vacuum steady. It should come out without much effort. However, be careful not to pull too hard, as you might accidentally damage the brush or vacuum.
Once you have the brush out, take a moment to inspect it. If it’s heavily entangled with hair or debris, it’s definitely time for a thorough cleaning.
With the brush successfully removed, you’re ready to proceed to the next step – cleaning it.
3. Inspect The Brush
Now that you’ve got the roller out, take a good look at it. Check for any debris, hair, or dust stuck in it. Sometimes, these particles can be deeply embedded into the bristles of the brush, making it difficult to clean. If you see any such particles, it’s a clear sign that your brush needs thorough cleaning.
Also, examine the bristles closely for any signs of wear and tear. If the bristles are worn out or bent, it may affect the cleaning performance of your Neato vacuum.
In addition to the bristles, inspect the bearing and belt of the brush. The bearing should rotate smoothly without producing any unusual sound. If it’s not, it might be because of dirt or debris stuck inside.
Similarly, the belt should be in good condition without any signs of damage. If the belt is worn out or stretched, it won’t be able to rotate the brush effectively, lowering the efficiency of your Neato.
4. Clean The Brush
Now, let’s dive into the nitty-gritty of cleaning your Neato brush. We’ve got some practical tips for you to master techniques for removing debris and dust, as well as tackling those difficult-to-reach areas. So, roll up your sleeves and get ready to give your brush the deep clean it needs to function at its best.
Techniques For Removing Debris And Dust
It’s crucial to regularly remove debris and dust from your Neato brush to maintain its optimum functionality. With a few simple techniques, you can keep your Neato brush clean and in top condition, ensuring it continues to provide a deep clean for your home.
Start by disconnecting the brush from the robot vacuum cleaner. Once it’s removed, manually rotate the brush, paying attention to the bristles and the areas between them. You’ll likely find accumulated dust, hair, and small particles that you need to remove.
Use a pair of scissors or a brush-cleaning tool to cut through any tangled hair or threads. Be careful not to damage the bristles while doing this. Once you’ve cut through these tangles, you can easily pull them out.
For smaller particles or dust, a simple blow or use of a small brush can do the trick. You may also want to use a damp cloth to wipe down the brush for a thorough cleaning, but make sure to thoroughly dry it before reattaching it to your Neato.
Regularly practicing these techniques can extend the life of your Neato brush and improve the efficiency of your robot vacuum cleaner.
Cleaning Difficult-To-Reach Areas
Don’t you just hate it when dust and debris find their way into those difficult-to-reach areas of your home? It’s even more frustrating when it’s your Neato robotic vacuum brush that’s harboring this muck. But don’t worry, there are effective ways to tackle this problem. Whether it’s tangled hair, accumulated dust, or small bits of debris, there are tricks to thoroughly clean your Neato brush and keep it functioning optimally.
One of the most effective methods is using a combination of a brush cleaning tool and a damp cloth. The brush cleaning tool, which usually comes with your Neato vacuum, is perfect for reaching those hard-to-reach areas and dislodging trapped dirt. The damp cloth, on the other hand, is great for wiping away any remaining dust or debris.
Now, let’s break down these steps in a simple table so you can easily follow through.
| Steps | Tools Needed | Tips |
| Remove the brush from the vacuum | None | Be gentle to avoid damaging the brush |
| Use the brush cleaning tool to dislodge trapped debris | Brush cleaning tool | Pay special attention to the ends of the brush |
| Wipe the brush with a damp cloth | Damp cloth | Ensure the cloth is not too wet to avoid damaging the brush |
5. Reinstall The Neato Brush
Once you’ve thoroughly cleaned your Neato brush, reinstalling it properly ensures your vacuum’s optimal performance.
Start by locating the brush compartment, which you previously opened to remove the brush. Gently slide the brush back into this compartment, ensuring that both ends of the brush align with the slots on either side. You should hear a faint click when the brush is properly in place.
Once the brush is in place, close the brush compartment. Make sure it’s securely fastened; any gaps could negatively affect the vacuum’s performance.
Next, turn the Neato vacuum upside down and check the roller to confirm that it’s firmly attached and spins freely. If it doesn’t, you may need to reposition the brush.
After you’ve done this, turn your vacuum right side up and run a quick test to ensure everything is functioning correctly. With the Neato brush properly reinstalled, your vacuum is now ready to tackle all your cleaning needs, offering you a safer, cleaner, and healthier living environment.
Remember, regular maintenance, including proper cleaning and reinstallation of the brush, is key to keeping your Neato vacuum running at its best.
How To Maintain & Extent The Life Of Your Neato Brush
Keeping your Neato brush in top shape doesn’t have to be a difficult task. By focusing on regular maintenance and understanding common troubleshooting techniques, you can significantly extend the life of your Neato brush and ensure its optimal performance.
Let’s dive into some handy tips and solutions to common problems that’ll help you get the most out of your Neato brush.
Tips To Extend The Life Of Your Neato Brush
Ensuring that your Neato brush is regularly cleaned and well-maintained can significantly extend its life, helping you to get the most out of your investment. But beyond regular cleanups, there are also other ways to ensure that your brush lasts longer.
For starters, always make sure to use your vacuum on the right surfaces. Hardwood, tile, and short-pile carpets are the best for your Neato brush. Also, avoid vacuuming big pieces of debris or damp areas, as these can damage the bristles of your brush and cause unnecessary wear and tear.
In addition, you should also check the brush regularly for any visible damage. If you notice any bent or missing bristles, it might be time for a replacement. To promote optimal performance, replace the brush every 6 to 8 months, or as needed based on its condition.
By following these simple steps, you can ensure that your Neato brush stays in top shape, allowing you to enjoy a cleaner home for a longer period of time.
Common Problems And Solutions
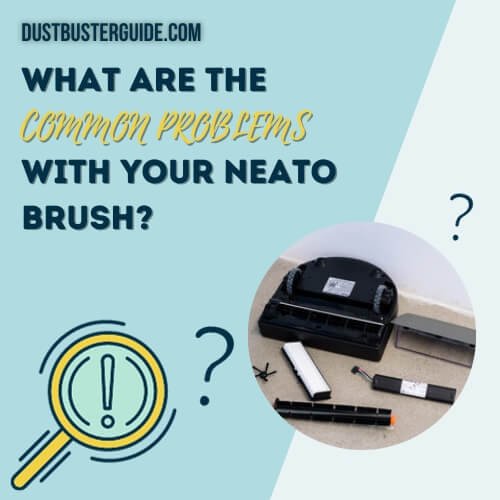
While adhering to the tips to extend the life of your Neato brush can’t completely eliminate the chances of encountering some issues, it can significantly improve its longevity.
Now, let’s dive into some common problems you might face with your Neato brush and how to efficiently solve them.
Firstly, if your Neato brush isn’t spinning, it may be due to a buildup of debris or hair. Regularly cleaning the brush can help prevent this issue. However, if the problem persists, it may be time to replace the brush.
Another common issue is a noisy brush. This is often caused by wear and tear and can be resolved by replacing the brush. But before you consider replacement, make sure to give it a thorough cleaning – sometimes, it’s just the trapped debris causing the noise.
Lastly, if you notice a decrease in your Neato’s cleaning efficiency, check the brush. If it’s worn out or damaged, replacing it can restore your vacuum’s performance.
How To Empty Neato D8
Emptying the dustbin on a Neato D8 is a straightforward process. Here’s a step-by-step guide:
- Locate the Dustbin: Open the lid or compartment on top of the Neato D8 to access the dustbin.
- Remove the Dustbin: Gently pull out the dustbin from its housing. It is usually located at the back or top of the vacuum.
- Open the Dustbin Lid: Most Neato D8 models have a lid on the dustbin. Open the lid to reveal the contents inside.
- Empty the Contents: Hold the dustbin over a trash bin and empty the collected dirt and debris. You may need to tap the sides or shake it gently to ensure all debris is removed.
- Clean the Filter (if applicable): If your Neato D8 has a filter, check and clean it according to the manufacturer’s instructions. Some filters can be tapped to remove loose debris, while others may be rinsed with water. Ensure the filter is completely dry before placing it back.
- Replace the Dustbin: After emptying and, if necessary, cleaning the filter, place the dustbin back into its original position, making sure it clicks securely into place.
Always refer to the user manual that came with your Neato D8 for specific instructions and any model-specific nuances regarding emptying the dustbin. Regular maintenance ensures your robot vacuum continues to perform effectively.
Conclusion
So now you know how to clean Neato brush. Keeping your Neato brush clean is not only necessary for the sake of hygiene, but it also helps to maintain its optimal performance.
Remember, a clean brush means a cleaner home. Don’t overlook the importance of regular maintenance and troubleshooting. By following the steps provided, you can extend the lifespan of your Neato vacuum and enjoy a cleaner, healthier living environment.
So, roll up your sleeves and get cleaning!
FAQs
What type of cleaning solutions or sprays are safe to use on the Neato brush?
You don’t need any special cleaning solutions or sprays for your Neato brush. Just use warm water and a mild detergent. Ensure it’s completely dry before reattaching it to avoid any potential damage.
How often should I replace the Neato brush entirely, rather than just cleaning it?
You should replace your Neato brush entirely every 6 to 8 months, depending on usage. If it’s heavily used or if the bristles look worn out, consider replacing it sooner to maintain optimal performance.
Does Neato offer a professional cleaning service for their brushes?
No, Neato doesn’t offer a professional cleaning service for their brushes. But don’t worry, cleaning them yourself is quite easy. Regular maintenance can extend the life of your Neato vacuum brush significantly.
Can I use a vacuum cleaner to clean the Neato brush?
Yes, you can use a vacuum cleaner to clean your Neato brush. However, ensure to carefully remove any stuck debris first. Always use a soft brush attachment to avoid damaging the bristles.
Are there any specific signs of wear and tear to look for on my Neato brush?
Yes, you should regularly check your Neato brush for signs of wear and tear. Look for frayed or damaged bristles, twisted or bent metal parts, and any unusual noises when it’s spinning.
How to do Neato D7 brush replacement?
To replace the brush on Neato D7, consult the user manual for specific instructions. Generally, it involves locating the brush compartment, unlocking or pressing a release button, removing the old brush, and attaching the new one securely.
How to remove brush Deato D4?
To remove the brush on Neato D4, refer to the user manual for detailed guidance. Typically, you’ll need to locate the brush compartment, release any securing mechanism, and gently pull or slide the brush out for removal.
External Resources
- Vacuum Cleaner Friction Injuries In Paediatrics: A 10 Year Review Of National Trends – ScienceDirect
- Modifications Of A Handheld Vacuum Cleaner For Noise Control – ResearchGate
- Psychoacoustic Analysis Of Vacuum Cleaner Noise – MDPI
- Design, Dirt And Disposal: Influences On The Maintenance Of Vacuum Cleaners – ScienceDirect