The dual-functionality dance of your robot vacuum encounters a mopping mystery, prompting the question: why is my robot vacuum not mopping? It’s a ballet of troubleshooting, ensuring your versatile cleaning companion seamlessly transitions between vacuuming and mopping. Picture this: your diligent robot vacuum signaling a cleaning discrepancy, and the question arises.
In just a couple of lines, the answer maneuvers in like a troubleshooting revelation: Check for proper assembly, ensure the water tank is filled, and confirm the mop attachment is securely in place to address potential issues.
But before you assume it’s a cleaning conundrum, join us on this exploration. We’ll guide you through the steps to bring back the mopping prowess to your robot vacuum.
Why Is My Robot Vacuum Not Mopping – Reasons
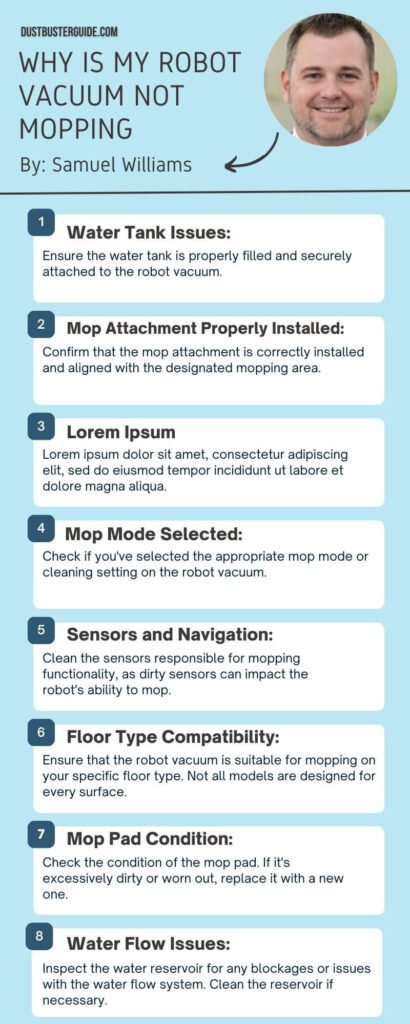
There are several possible reasons why your robot vacuum is not mopping as expected. Let’s explore each one in detail:
- Product Specifications: Check the product specifications of your robot vacuum to ensure that it is designed to mop. Not all robot vacuums have mopping capabilities, so it’s important to verify this information.
- Dirty Mopping Module: If the mopping module of your robot vacuum is dirty or clogged, it may not be able to dispense water properly. Clean the mopping module according to the manufacturer’s instructions to ensure its optimal performance.
- Water Tank: Make sure the water tank of your robot vacuum is properly filled. If the tank is empty or not filled to the recommended level, the robot vacuum may not be able to mop effectively.
- Mopping Settings: Check the mopping settings on your robot vacuum. Ensure that the mopping function is enabled and set to the desired intensity. Adjusting the settings may improve the mopping performance.
- Compatible Mopping Pads: Ensure that you are using compatible mopping pads with your robot vacuum. Using the wrong type of pads may hinder the mopping action or cause damage to the robot vacuum.
- Dirty Sensors: Clean the sensors of your robot vacuum regularly. Dust and debris on the sensors can affect the robot’s ability to detect obstacles and navigate efficiently, which can impact its mopping performance.
Troubleshooting And Fixing The Issue
Now that we have identified the possible reasons behind your robot vacuum not mopping, let’s look at some troubleshooting steps to fix the issue:
Check The Product Specifications
Are you frustrated because your robot vacuum isn’t mopping? Let’s see why this might be happening by checking the product specifications.
When you first purchase your robot vacuum, it’s important to carefully read the product specifications to ensure that it has the mopping feature. Not all robot vacuums have this capability, so it’s possible that yours may not be designed to mop at all. If the product specifications don’t mention mopping as one of its features, then it’s likely that your vacuum doesn’t have this function.
Even if your robot vacuum does have the mopping feature, it may not be activated by default. Some vacuums require you to manually switch between the vacuuming and mopping modes. Check the user manual or the product specifications to see if there are any specific instructions on how to enable the mopping feature. It’s possible that you simply need to adjust a setting or press a button to activate the mopping function.
Another factor to consider is the type of flooring in your home. Robot vacuums with mopping capabilities may not be suitable for all types of flooring. For example, they may not be effective on carpeted surfaces or certain types of hardwood floors. It’s important to check the product specifications to see if there are any restrictions on the types of flooring that the robot vacuum can mop. If your floor isn’t compatible with the mopping feature, you may need to consider alternative cleaning methods for those areas.
Clean The Mopping Module
To address the issue of the robot vacuum not mopping, one important step is to clean the mopping module. Over time, dirt, debris, and residue can accumulate on the mopping module, hindering its ability to effectively mop the floors. Cleaning the module regularly will help ensure that it functions properly and provides the desired mopping results.
When cleaning the mopping module, it is crucial to follow the manufacturer’s instructions. Start by removing the module from the robot vacuum. Depending on the model, this may involve pressing a release button or pulling it out gently. Once removed, inspect the module for any visible dirt or clogs. Use a soft brush or cloth to remove any debris that may be stuck on the module’s surface.
After removing the visible dirt, it is time to clean the mopping module more thoroughly. Fill a basin or sink with warm water and add a small amount of mild detergent. Submerge the module in soapy water and gently agitate it to loosen any stubborn dirt or residue. Allow the module to soak for a few minutes before rinsing it thoroughly with clean water. Make sure to remove all traces of detergent to prevent it from interfering with the mopping function.
To give you a clearer idea of how to clean the mopping module, here is a table summarizing the steps:
| Step | Instructions |
| 1 | Remove the mopping module from the robot vacuum. |
| 2 | Inspect the module for visible dirt or clogs and remove them using a soft brush or cloth. |
| 3 | Fill a basin or sink with warm water and add a small amount of mild detergent. |
| 4 | Submerge the module in the soapy water and gently agitate it to remove stubborn dirt or residue. |
| 5 | Allow the module to soak for a few minutes, then rinse it thoroughly with clean water. |
By regularly cleaning the mopping module, you can ensure that your robot vacuum performs optimally and provides efficient mopping. Taking the time to maintain this component will help you achieve cleaner floors and a more satisfactory mopping experience.
Check The Water Tank
Check the water tank to ensure that it’s filled with clean water and functioning properly. The water tank is an essential component of your robot vacuum’s mopping feature. If the tank isn’t filled or there’s an issue with it, your robot vacuum may not be able to effectively mop your floors.
So, let’s dive into some details about checking the water tank.
- Firstly, make sure that the water tank is properly inserted into your robot vacuum. Sometimes, it may not be securely attached, which can lead to a lack of water flow during mopping. Take a moment to remove the tank and reattach it, ensuring it clicks into place. This simple step can resolve any connection issues and allow water to flow smoothly.
- Secondly, check the water level in the tank. Your robot vacuum won’t be able to mop if the tank is empty or too low on water. Fill the tank with clean water up to the indicated maximum level. It’s important to use clean water to prevent any dirt or debris from clogging the mopping module. Regularly empty and clean the tank to maintain optimal performance.
- Lastly, inspect the water tank for any signs of damage or leaks. A damaged tank can lead to water leakage, which can not only impact the mopping function but also potentially damage your floors. If you notice any cracks or leaks, it’s best to replace the water tank to ensure proper functioning.
Adjust The Mopping Settings
Ensure that you adjust the mopping settings on your robot vacuum to achieve the perfect level of cleanliness for your floors, leaving you with a sense of satisfaction and pride in your spotless home. Most robot vacuums come with customizable mopping settings that allow you to control the amount of water dispensed and the intensity of the mopping action. By adjusting these settings, you can ensure that your robot vacuum is effectively mopping your floors and removing any dirt or grime.
To adjust the mopping settings on your robot vacuum, start by checking the user manual or the manufacturer’s website for instructions specific to your model. Each robot vacuum may have a different interface or method for adjusting the settings, so it’s important to follow the correct steps. Once you have located the mopping settings, you can typically choose from options such as low, medium, or high water flow, as well as different mopping patterns or durations.
To give you a better understanding of how the mopping settings work, here’s a table that illustrates the different options available on some robot vacuums:
| Mopping Setting | Water Flow | Mopping Pattern | Duration |
| Low | Minimal | Random | 30 mins |
| Medium | Moderate | Zigzag | 45 mins |
| High | Maximum | Spiral | 60 mins |
By adjusting the water flow, you can control the amount of water sprayed onto the mopping cloth. If you find that your floors are not getting adequately mopped, try increasing the water flow setting. However, be cautious not to use too much water, as excessive moisture can damage certain types of flooring.
Additionally, adjusting the mopping pattern can also make a difference in the effectiveness of the mopping action. Some robot vacuums offer options such as random, zigzag, or spiral patterns. Experiment with different patterns to see which one works best for your floors. The duration setting allows you to control how long the robot vacuum will spend mopping your floors. Depending on the size of your home and the level of cleanliness you desire, you can adjust the duration accordingly.
Use Compatible Mopping Pads

Using compatible mopping pads will enhance the cleaning performance of your robot vacuum and leave your floors looking impeccable. When it comes to mopping, not all robot vacuums are compatible with all types of mopping pads. It’s important to check the user manual or the manufacturer’s website to ensure that you’re using the correct mopping pads for your specific model.
Using the wrong mopping pads can result in poor cleaning performance and can even damage your robot vacuum. Some mopping pads may be too thick or too thin for your robot vacuum to properly navigate and clean your floors. Others may not have the necessary fibers or textures to effectively remove dirt and grime. By using compatible mopping pads, you can ensure that your robot vacuum is able to mop your floors thoroughly and efficiently.
In addition to using compatible mopping pads, it’s also important to regularly clean and replace them. Over time, mopping pads can become dirty and worn out, which can affect their cleaning performance. By regularly cleaning and replacing your mopping pads, you can ensure that your robot vacuum is always able to deliver optimal mopping results. Check the user manual or the manufacturer’s website for instructions on how to clean and replace the mopping pads for your specific model.
Clean The Sensors
If your robot vacuum isn’t mopping as it should, there could be a simple solution. In the previous subtopic, we discussed the importance of using compatible mopping pads. Now, let’s move on to the next step in troubleshooting: cleaning the sensors.
Just like any other electronic device, robot vacuums have sensors that help them navigate and perform their tasks efficiently. However, if these sensors are dirty or obstructed, it can affect the vacuum’s ability to mop effectively.
To ensure that your robot vacuum is mopping properly, it’s essential to keep the sensors clean. Over time, dust, dirt, and debris can accumulate on the sensors, hindering their performance.
To clean the sensors, start by turning off the vacuum and removing any mop attachments. Use a soft, lint-free cloth or cotton swab to gently wipe the sensors, removing any dirt or grime. Be careful not to apply too much pressure or use any harsh cleaning agents that could damage the sensors.
Once the sensors are clean, reattach the mop and try running the vacuum again to see if the mopping function is working correctly.
In addition to cleaning the sensors, it’s also important to regularly check for any obstructions that could be blocking the sensors’ path. Sometimes, small objects or even tangled hair can get caught in the sensors, preventing them from functioning properly.
Take a close look at the sensors and surrounding areas to ensure there are no physical obstructions. If you notice any blockages, carefully remove them using tweezers or a small brush.
Once the sensors are clear, try running the vacuum again to see if the mopping function is restored.
Contact Customer Support
Contact customer support for assistance with your robot vacuum’s mopping function. They are trained to help troubleshoot any issues you may be experiencing and can provide guidance on how to get your robot vacuum to mop properly. Customer support can often be reached through various channels such as phone, email, or live chat. Be sure to have your robot vacuum’s model number and any relevant information ready when contacting customer support to help expedite the process.
In the meantime, here are a few common reasons why your robot vacuum may not be mopping as expected:
- Incorrect setting: Check if you have properly set the vacuum to mop mode. Some robot vacuums have separate cleaning modes for vacuuming and mopping. Ensure that you have selected the appropriate mode for mopping.
- Dirty or clogged water tank: If your robot vacuum has a separate water tank for mopping, make sure it is filled with clean water and not clogged with debris. Clean the water tank regularly to prevent any blockages that may hinder the mopping function.
- Faulty sensors: The robot vacuum relies on sensors to navigate and detect obstacles while mopping. If the sensors are dirty or obstructed, it may affect the vacuum’s ability to mop effectively. Clean the sensors using a soft cloth or brush to remove any dirt or dust that may be blocking them.
Remember, these are just a few possible reasons why your robot vacuum may not be mopping as expected. For a more accurate diagnosis and solution, it is best to contact customer support directly. They will be able to provide you with specific troubleshooting steps based on your robot vacuum’s model and features.
Contacting customer support is the most effective way to address any issues with your robot vacuum’s mopping function. They have the expertise and resources to guide you through troubleshooting steps and provide personalized solutions. Don’t hesitate to reach out for assistance and get your robot vacuum back to mopping efficiently.
Why My Shark Robot Vacuum Keeps Saying Clean
If your Shark robot vacuum keeps saying “clean,” it could be due to a few reasons. One common reason is that the vacuum’s sensors are dirty or obstructed, causing it to think that it needs to be cleaned. To fix this, you can clean the sensors and ensure that there are no obstructions in the vacuum’s path.
Another reason could be that the vacuum’s filters are dirty or clogged, causing it to lose suction power and prompting the “clean” message. In this case, you can clean or replace the filters to restore the vacuum’s performance.
Additionally, if the vacuum’s battery is low, it may prompt the “clean” message. Placing the vacuum on the charging dock to recharge can resolve this issue.
By addressing these issues promptly, you can ensure that your Shark robot vacuum is functioning optimally and providing effective cleaning performance. Regular maintenance, such as cleaning the sensors and filters, can also help prevent these issues from occurring in the first place.
Conclusion
So here’s a complete guide to answer your: why is my robot vacuum not mopping? If your robot vacuum isn’t mopping as expected, there are several steps to troubleshoot the issue. First, ensure your model includes a mopping feature, clean the mopping module, and check the water tank’s proper insertion and water level. Adjust the mopping settings and use recommended pads, keeping sensors clean to avoid interference. If issues persist, contacting customer support is recommended. These troubleshooting steps aim to optimize your robot vacuum’s mopping functionality.
FAQs
How do I check the product specifications of my robot vacuum to know if it has mopping capabilities?
To check if your robot vacuum has mopping capabilities, you need to refer to its product specifications. Look for features like mopping mode or water tank capacity. These details can usually be found in the user manual or on the manufacturer’s website.
What should I do if my robot vacuum’s mopping module is not working?
If your robot vacuum’s mopping module is not working, there are a few steps you can take to troubleshoot the issue. First, check if the mopping module is properly attached and the water tank is filled. Secondly, ensure that the mopping function is enabled in the settings. Lastly, clean the mopping module and the sensors to remove any dirt or debris that may be affecting its performance.
How can I check if the water tank in my robot vacuum is properly connected and filled?
- To check if the water tank in your robot vacuum is properly connected and filled, follow these steps:
- Remove the water tank and ensure it is securely attached.
- Check if the tank is filled with water up to the appropriate level.
- Reinsert the tank and make sure it clicks into place.
- Run the vacuum in mopping mode to see if it dispenses water as intended.
What steps should I take to adjust the mopping settings on my robot vacuum?
To adjust the mopping settings on your robot vacuum, follow these steps: 1) Locate the settings menu on the vacuum’s control panel. 2) Select the mopping option and choose the desired intensity. 3) Press the start button to begin mopping.
Can I use any type of mopping pads with my robot vacuum, or are there specific ones that are compatible?External Resources
Yes, you need to use specific mopping pads that are compatible with your robot vacuum. Using the wrong type of pads may prevent your vacuum from effectively mopping. Check the manufacturer’s recommendations for the correct pads to use.
External Resources
- Typical Household Vacuum Cleaners: The Collection Efficiency And Emissions Characteristics For Fine Particles – Taylor & Francis Online
- Industrial Vacuums Cleaners Market Key Insights And Industry Outlook 2023 – Glasgow West End Today
- Robot Vacuum Cleaner Personality And Behavior – Springer Link
- Consumer Buying Behaviour Of Sustainable Vacuum Cleaners – Consequences For Design And Marketing – ScienceDirect