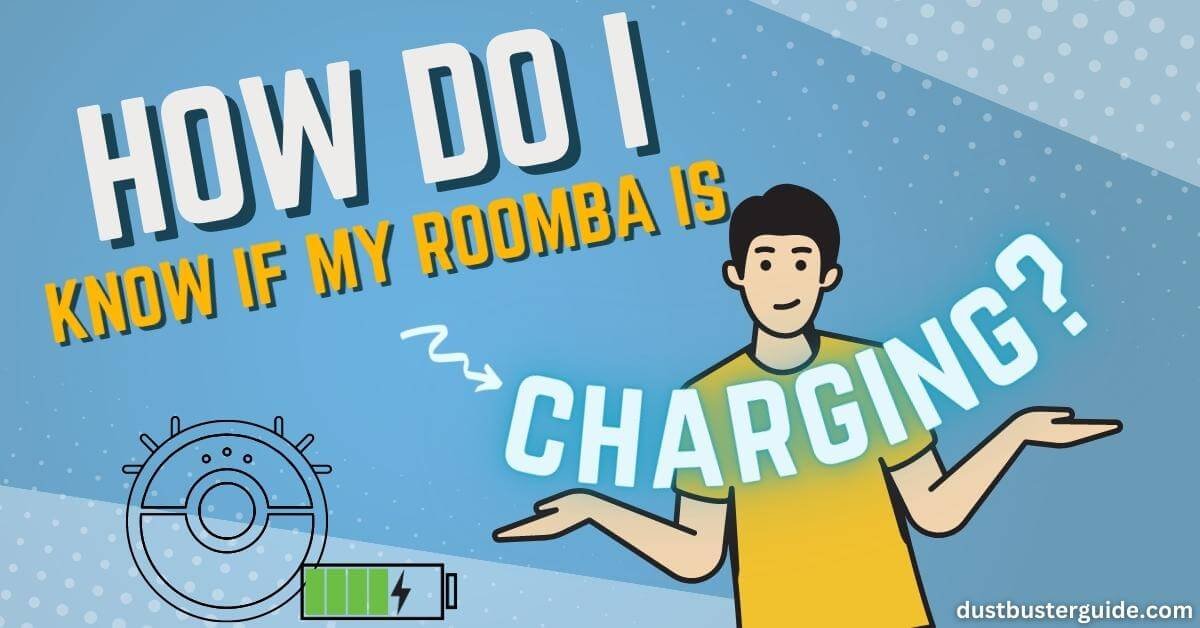
Ever found yourself in a state of uncertainty, gazing at your Roomba and pondering, how do I decipher the subtle signs that my diligent cleaning companion is soaking up some digital energy? Today, we’re delving into the realm of robotic recharge how do I know if Roomba is charging? Picture this: your electronic sidekick quietly going through its charging routine.
In just a couple of lines, the answer: observe the power indicator on your Roomba, typically illuminated during charging. But before you assume it’s a straightforward visual cue, join us on this exploration.
We’ll unravel the indicators, ensuring you can confidently recognize when your Roomba is indulging in a well-deserved power-up, gearing up for its next cleaning escapade!
How Do I Know If Roomba Is Charging – Explained Here
Ever wondered how to tell if your Roomba is charging? Let me tell you the foolproof way to know with just a quick glance!
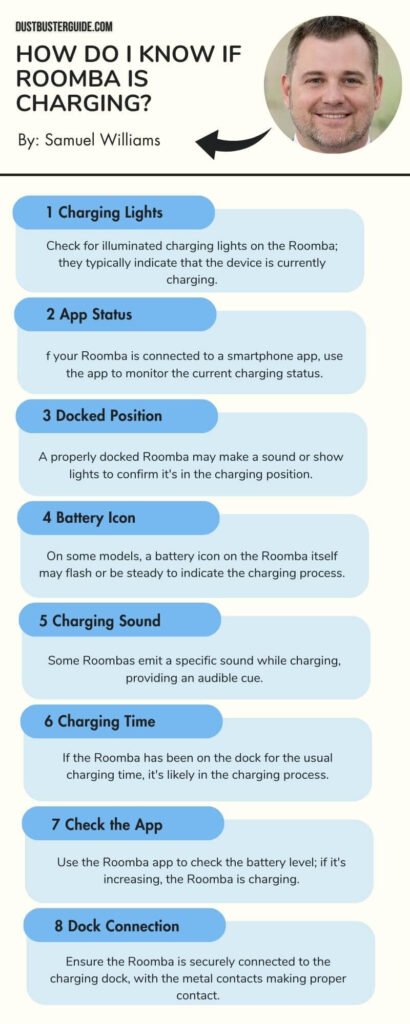
First and foremost, the easiest way to check if your Roomba is charging is to look for the indicator light. Most Roomba models have a small light located on the device itself, usually near the ‘Clean’ button. When your Roomba is charging, this light will be illuminated and usually turns green. It’s a simple yet effective way to visually confirm that your Roomba is indeed getting the power it needs to recharge.
If you can’t find the indicator light or it’s not very visible, don’t worry! Another way to check if your Roomba is charging is to look for the charging symbol on the device’s display screen. Some newer Roomba models have a small screen that displays various icons and information. When your Roomba is plugged in and charging, you should see a battery symbol or a similar charging icon on the screen. This is a clear indication that your Roomba is connected to its charging dock and is in the process of recharging its battery.
So, the next time you’re unsure if your Roomba is charging, simply look for the indicator light or the charging symbol on its display screen. These quick visual cues will give you the peace of mind that your Roomba is getting the energy it needs to keep your floors clean and tidy.
Does Roomba Light Stay On When Charging?
Sometimes you can tell if your Roomba is charging by simply checking if the light stays on. When you plug in your Roomba to charge, the power indicator light on the device will turn on. This light will usually stay on throughout the charging process. So, if you see the light illuminated, it means that your Roomba is currently charging and you can leave it to do its job.
However, it’s important to note that some older models of Roomba may have a different charging indicator, such as a blinking light or a pulsing light. In these cases, you may need to consult the user manual or contact customer support to understand the charging status.
It’s worth mentioning that the charging time for a Roomba can vary depending on the model and the battery’s current charge level. Generally, it takes about 2-3 hours for a Roomba to fully charge. Once the battery is fully charged, the light on your Roomba will typically turn off. This is a good indication that your Roomba is fully charged and ready to be used.
Why Does The Charging Light On My Roomba Turn Off?
When the light on your Roomba turns off during the charging process, it may be due to a variety of reasons that need to be addressed.
One possible reason is that the Roomba has reached a full charge and is now in standby mode. In this case, the light will turn off to indicate that the charging process is complete. You can check if the Roomba is fully charged by pressing the ‘Clean’ button on the device. If it starts cleaning, then it means the Roomba is fully charged and ready to go.
Another reason why the charging light may turn off is if there is an issue with the power source or the charging dock. Make sure that the power cord is securely plugged into the charging dock and that the dock is properly connected to a power outlet. If the power source is working fine, try cleaning the charging contacts on both the Roomba and the dock with a soft, dry cloth to ensure a good connection.
If the charging light on your Roomba turns off, it could indicate that the device is fully charged or that there is an issue with the power source or charging dock. By checking the device’s functionality and ensuring a proper connection to the power source, you can address the issue and ensure that your Roomba is charging correctly.
Why Is My Roomba Not Charging?
If your Roomba is not charging, there are a few things you can check.
- First, make sure the contact points on both the Roomba and the docking base are clean and free of any debris.
- Next, check the power source to ensure it’s working properly and providing enough power.
- Additionally, double-check that the battery is properly positioned in the Roomba and try resetting it.
If all else fails, you may need to perform a factory reset on your Roomba.
Clean Contact Points And The Docking Base
To ensure your Roomba is charging, make sure to regularly clean the contact points and docking base – this will keep your robotic companion powered up and ready to go and give you peace of mind knowing it’s always ready for action.
Over time, dust, dirt, and debris can accumulate on the contact points, preventing a proper connection between the Roomba and the docking base. To clean them, simply use a dry cloth or a soft brush to gently wipe away any buildup. Be sure to also clean the docking base itself, as dust and dirt can accumulate there as well.
By keeping both the contact points and docking base clean, you can ensure a strong and reliable connection, allowing your Roomba to charge efficiently.
Regularly cleaning the contact points and docking base not only ensures that your Roomba is charging properly but also helps to extend the lifespan of your robotic vacuum.
Check The Power Source
Make sure you’re plugged into a reliable power source to keep your Roomba powered up and ready to tackle any mess. Check if the power cord is securely connected to both the docking base and the wall outlet. Sometimes, the cord can become loose or disconnected, which can prevent your Roomba from charging properly.
Ensure that the power cord is not damaged or frayed, as this can also affect the charging process. If you notice any issues with the power cord, it’s important to replace it to ensure a consistent power supply for your Roomba.
Additionally, check if the wall outlet is functioning properly. Plug in another device to see if it receives power from the outlet. If the outlet is not working, try plugging your Roomba into a different outlet.
It’s also a good idea to avoid using extension cords or power strips, as they can sometimes interfere with the charging process.
By ensuring that you have a reliable power source, you can be confident that your Roomba will charge effectively and be ready to clean whenever you need it.
Check The Battery Position
Ensure that the battery is securely positioned in its designated slot to ensure a seamless power flow for your Roomba. Before you check the battery position, make sure your Roomba is turned off and unplugged from the power source.
Once you’ve confirmed this, locate the battery compartment on the underside of your Roomba. It’s usually near the back of the robot and can be easily identified by the latch or release button. Press the latch or release button and open the battery compartment to access the battery.
Once the battery compartment is open, check if the battery is properly placed. The battery should fit snugly into its designated slot without any loose connections. If the battery’s loose or not seated correctly, remove it and reinsert it, ensuring it clicks into place securely. This step is crucial in ensuring a proper power connection between the battery and your Roomba.
Once you have securely positioned the battery, close the battery compartment and make sure it’s securely latched or locked. Now you can plug your Roomba into the power source and check if it starts charging. If the battery’s properly positioned, your Roomba should start charging, and the charging indicator light should turn on.
Reset Your Roomba
If you’ve checked the battery position of your Roomba and it still doesn’t seem to be charging, don’t worry! There’s another step you can take to try and resolve the issue. The next thing you can do is reset your Roomba.
Resetting your Roomba can help in cases where the charging process gets stuck or the robot is not responding properly.
To reset your Roomba, start by turning the robot upside down. Locate the reset button, which is usually found on the underside of the machine. Press and hold the reset button for about 10 seconds, until you hear a beep. After you hear the beep, release the button and turn your Roomba back over. This should reset the robot and clear any glitches that may be preventing it from charging properly.
Once you’ve completed the reset process, try placing your Roomba back on the charging dock and see if it starts charging.
Remember, troubleshooting steps like checking the battery position and resetting the Roomba can often resolve common charging issues, so it’s always worth giving them a try before seeking professional help.
Factory Reset Your Roomba
To completely restore your Roomba to its original settings, you can perform a factory reset. This will erase all user data and settings, bringing your Roomba back to its initial state as if it were brand new.
To initiate a factory reset, first, make sure your Roomba is powered on. Then, locate the ‘Clean’ button on your Roomba’s control panel. Press and hold the ‘Clean’ button for about 10 seconds until you hear a tone. Release the button, and your Roomba will play a series of tones to indicate that it has successfully reset.
After the factory reset, your Roomba will power off and then restart. You can now set up your Roomba again as if it were the first time you used it. Remember to connect it to your home Wi-Fi network and customize any settings according to your preferences.
It’s important to note that performing a factory reset will delete all saved schedules, preferences, and maps. So, if you want to keep any specific settings or maps, make sure to back them up before proceeding with the factory reset.
Replace Your Roomba Battery
When your Roomba starts to lose power and struggles to navigate your home, it’s time to replace its battery.
Fortunately, replacing the battery is a simple process that you can do yourself. Start by turning off your Roomba and flipping it over to access the battery compartment. Then, remove the old battery by pulling on the tab or lever that secures it in place. Make sure to disconnect any wires or connectors that may be attached to the battery.
Once the old battery is removed, insert the new battery into the compartment, ensuring that it is securely in place. Reconnect any wires or connectors, and then flip your Roomba back over. You can now turn it back on and enjoy the renewed power and performance of your Roomba with its new battery.
It’s important to note that not all Roomba models have user-replaceable batteries. If you have one of these models, you may need to contact Roomba customer support or take your Roomba to an authorized service center to have the battery replaced.
Additionally, it’s recommended to use genuine Roomba batteries or batteries that are compatible with your specific Roomba model. Using third-party batteries may void your warranty or cause damage to your Roomba.
By following these steps and guidelines, you can easily replace your Roomba battery and continue to enjoy the efficient cleaning power of your Roomba for years to come.
Pros And Cons Of Replacing Your Roomba Battery
Why Your Roomba Is Beeping During The Charge?
If your Roomba is beeping during the charging process, it may indicate an issue that requires attention. The beeping sound could be a response to a specific error or a fault in the charging system.
Common reasons for beeping during charging include problems with the power source, such as an improperly connected power cord or issues with the charging dock. Additionally, it could signal an error with the Roomba’s battery, like overheating or a malfunction.
To troubleshoot, ensure that the charging contacts on both the Roomba and the dock are clean, the power cord is securely connected, and the charging dock is placed on a level surface.
If the issue persists, consulting Roomba’s user manual or contacting the manufacturer’s customer support may provide further guidance on resolving the specific problem triggering the beeping during the charging process.
How Long Does It Takes For Roomba To Charge
The time it takes for Roomba to fully charge can vary depending on the model and battery level. On average, it takes about two to three hours for a Roomba to fully charge. However, this can be longer or shorter depending on factors such as the age and condition of the battery.
To ensure that your Roomba is fully charged and ready to clean, it’s recommended to leave it plugged in overnight or for at least three hours. Most Roomba models come with a charging dock where you can easily park your Roomba when it’s not in use. The charging dock is designed to provide a convenient and efficient way to recharge your Roomba.
When your Roomba is placed on the charging dock, it will automatically start charging. You can check the charging status by looking at the indicator lights on your Roomba or the charging dock. Once the battery is fully charged, the indicator lights will turn green, indicating that your Roomba is ready to go.
Tips For Optimizing Roomba Charging Efficiency
Here are 12 tips to maximize Roomba’s charging efficiency:
- Place the Home Base in an easily accessible and open area. Avoid placing it in a corner or under furniture to ensure Roomba can easily find its way back to charge.
- Keep the Home Base and charging contacts on the Roomba clean. Dust or debris can interfere with the charging process, so regularly wipe them down with a clean cloth.
- Make sure the charging station is plugged into a functioning outlet. Check that the power cord is securely connected and not damaged.
- Avoid using extension cords or power strips for the charging station. Directly plugging it into a wall outlet ensures a more stable and efficient charge.
- If possible, keep the Home Base away from direct sunlight or extreme temperatures. High or low temperatures can affect the battery’s performance and charging efficiency.
- Place the Roomba on the Home Base after each cleaning session to ensure it is always charged and ready to go. Leaving it off the base for extended periods can lead to a drained battery.
- If you have a large area to clean, consider dividing it into zones and running Roomba in smaller sessions. This will prevent the battery from draining completely and ensure it has enough time to charge between cleanings.
- Use the scheduling feature to set Roomba to clean at times when you know it will have enough time to fully charge. This way, it won’t interrupt its cleaning cycle to return to the Home Base prematurely.
- Keep the Roomba’s brushes and filter clean. Clogged or dirty brushes can cause the motor to work harder, draining the battery faster and reducing charging efficiency.
- Optimize your cleaning settings. Adjust the cleaning mode and runtime according to your needs. Running Roomba on the highest power setting for a longer time may drain the battery faster and affect charging efficiency.
- Consider using a virtual wall or barrier to restrict Roomba’s cleaning area. This will prevent it from unnecessarily wandering and using up more battery power.
- If you notice that Roomba’s battery is not holding a charge or its cleaning performance has significantly decreased, it may be time to replace the battery. A worn-out battery can affect the charging efficiency.
By following these tips, you can ensure that your Roomba charges efficiently and is always ready to keep your floors clean.
What To Do If Roomba Doesn’t Show Charging Signs
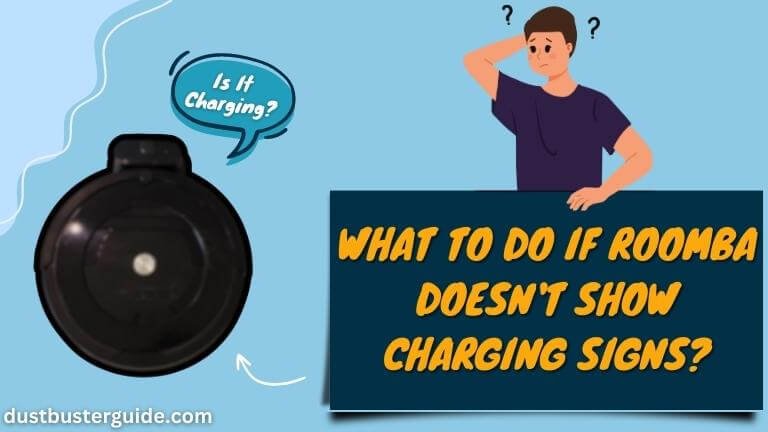
If your Roomba fails to display any signs of charging, there are several troubleshooting steps you can take to resolve the issue.
First, check if the power cord is properly connected to both the Roomba and the charging dock. Ensure that the power outlet is working by plugging in another device. If the outlet isn’t providing power, try plugging the charging dock into a different outlet.
If the power cord and outlet aren’t the issue, check for any loose connections between the Roomba and the charging dock. Make sure that the metal contacts on both the Roomba and the dock are clean and free from debris. If there’s any dirt or dust on the contacts, gently wipe them clean with a soft cloth.
If the connections are secure and the contacts are clean, try resetting the Roomba. To do this, press and hold the CLEAN button for 10 seconds until the Roomba plays a tone. Release the button and wait for the Roomba to reset. Once it has reset, place it back on the charging dock and see if it starts to charge.
If none of these troubleshooting steps work, there may be an issue with the battery or the charging dock itself. In this case, it’s recommended to contact Roomba customer support for further assistance. They’ll be able to guide you through the process of diagnosing and resolving the charging issue. Remember to provide them with any relevant information, such as the model number of your Roomba, to help them assist you more effectively.
What Does The Different Lights Mean On Roomba
Explore the meaning behind the different lights on your Roomba and discover how they can bring a sense of clarity and understanding to your cleaning routine. The lights on your Roomba serve as a helpful indicator of its current status.
Let’s take a closer look at what each light means.
- First, we have the power light. This light indicates whether your Roomba is powered on or off. When the power light is solid green, it means your Roomba is fully charged and ready to go. If the power light is pulsing amber, it indicates that your Roomba is charging.
- Next, we have the clean light. This light lets you know when your Roomba is actively cleaning. When the clean light is solid green, it means your Roomba is cleaning as expected. If the clean light is pulsing red, it means there is an error or issue that needs to be addressed. In this case, referring to your Roomba’s user manual or contacting customer support can help you troubleshoot the problem.
Understanding the meaning behind the different lights on your Roomba can help you stay informed about its current status. Whether it’s fully charged and ready to clean or encountering an error, these lights provide valuable information to ensure a smooth cleaning routine.
Conclusion
So now you have a complete guide to your question how do I know if Roomba is charging
To determine if your Roomba is charging, check the charging light and understand its meaning. If the light turns off, there may be a loose connection or faulty power source. Troubleshoot these issues for proper charging. If your Roomba isn’t charging at all, check battery contacts, clean them if needed, and ensure the charging dock works properly. Contact customer support if the problem persists.
Charging time varies based on the model and battery level, typically taking 2-3 hours. To optimize charging efficiency, keep the dock accessible, clean battery contacts, and remove obstacles. Monitoring the charging light is key to knowing if your Roomba is charging. Troubleshoot, optimize efficiency, and seek assistance if needed for a charged and ready Roomba.
FAQs
What are the reasons for the Roomba charging light turning off?
The Roomba charging light can turn off for several reasons. It could be because the battery is fully charged, there is a problem with the power source, or there is an issue with the charging dock.
Why is my Roomba not charging?
To troubleshoot why your Roomba is not charging, check if the charging dock is properly connected and the power outlet is working. Make sure the charging contacts on the Roomba and dock are clean and try resetting the robot.
How long does it take for a Roomba to charge?
It takes about 2-3 hours for a Roomba to fully charge. You can check the charging status by looking for a solid green light on the home base or pressing the “Clean” button on the Roomba itself.
What are some tips for optimizing Roomba charging efficiency?
To optimize Roomba charging efficiency, make sure to place the charging dock in an easily accessible location, free from obstructions. Additionally, clean the charging contacts regularly and avoid exposing the Roomba to extreme temperatures.
What should I do if my Roomba doesn’t show any charging signs?
If your Roomba doesn’t show any charging signs, first make sure it’s properly connected to the charging dock. If it is, check if the dock is plugged in and the power outlet is working.
How often does a Roomba battery need to be replaced?
The lifespan of a Roomba battery varies, but on average, it may need replacement every 1 to 2 years, depending on usage and charging habits. Signs of a failing battery include reduced runtime or the Roomba not holding a charge.
Why isn’t my Roomba holding charge?
If your Roomba isn’t holding a charge, it could be due to a worn-out battery. Consider replacing the battery or checking for charging issues, such as a faulty charging dock or power source.
External Resources
- Microbial Contents Of Vacuum Cleaner Bag Dust And Emitted Bioaerosols And Their Implications For Human Exposure Indoors – ASM Journal Platform
- Dyson Says It Will Appeal After £150m Damages Claim Rejected By EU Court – The Guardian
- Automated Pool Cleaner – WIKIPEDIA
- Review Study On Vacuum Cleaners – Ekosuunnittelu.info