Encountering the captivating spectacle of a red-flashing Roomba and wondering, what’s the secret language behind the red glow? Today, we’re unraveling the enigma of why is my Roomba flashing red? Imagine your robot vacuum as a silent communicator, using hues to convey its status. In just a couple of lines, the answer: it’s a signal, often indicating a charging or battery issue.
But before you assume a cleaning crisis, join us on this visual journey. We’ll decode the language of red flashes, ensuring your Roomba’s communication remains crystal clear and its cleaning performance is ready to shine without any mysterious signals!
What Do Different Patterns Of Roomba’s Flashing Red Light Mean?
If your Roomba is flashing red, you should be concerned about a specific scenario. Basically, one of three colors indicates the current status of Roomba robot vacuums.
- White: Robot is working properly and has no problems.
- Blue: A unique task is being carried out by the robot.
- Red: There is a problem now.
Remember that the ring light system (turned on by default), must be active for this to function. To turn off this color notification, press and hold the “Clean” button on your device for at least two seconds, and this system will be off.
We must first be familiar with numerous red-light patterns to figure out the issue with our devices. The red light may rotate, flash, swipe down, or remain lit. The signal’s significance differs due to this variation in the movement pattern.
See the different movements of the red light on Roomba robot vacuum cleaners below for an explanation of what they imply.
Roomba Red Light Meanings
- Red light remains illuminated (solid) – There was an issue.
- Red light flashes: Insufficient battery power to start
- Red light clockwise: Low battery level (below 15%)
- Red light waves down – Dust bin is full
How We Can Fix The Different Red Light Issues On The Roomba Vacuum Cleaner
Now that we are aware of the errors your Roomba vacuum is trying to alert you to, let’s see what we can do to correct it:
Roomba Red Light Stays On (Solid)
There is an error every time the red light on a Roomba is solid. You must click the ‘Clean’ option to find out what’s wrong.
After pushing the button, you will hear an error code; to find out what that specific error code means, visit the App or consult the user manual. Numerous issues, such as clogged brushes and unclean gearboxes, may exist.
Overall, cleaning the Roomba robot vacuum will ensure that it runs without hiccups and that no warning lights come up. We advise cleaning the iRobot Roomba vacuum regularly to lengthen the lifespan of your cleaning robot.
Roomba Red Light Blinks/Flashes
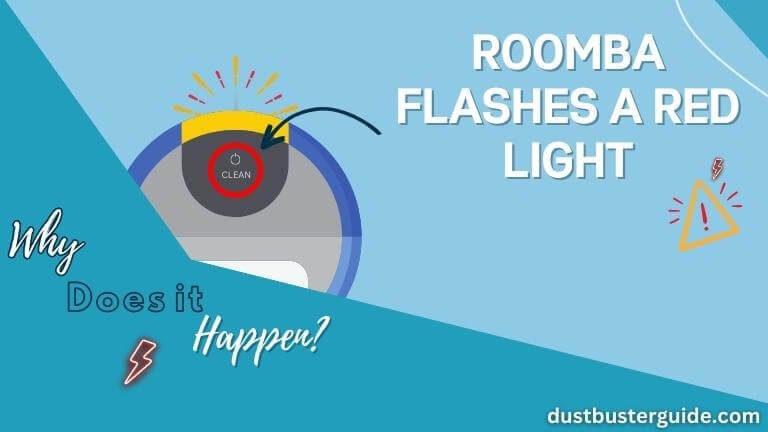
So, this might answer your why is my Roomba flashing red. The Roomba’s ring light indicates a low battery by flickering red. At this battery level, you cannot instruct your Roomba to clean.
Sending the Roomba to the dock station for charging immediately will resolve this problem. Your battery will run out of power before it should if you encounter too many blinking red lights.
We advise charging your Roomba as frequently as possible because doing so would stop battery loss during cleaning and result in a solid red light.
The Red Light Rotates Clockwise
You will notice the red light on the Roomba spinning clockwise when the battery level reaches 15%. Your robot vacuum is still functioning, but you must plug it into the charging station soon to ensure it keeps functioning.
This occurs before the red-light flashing event, in which the Roomba fully stops operating.
You can click here to learn about what the “red exclamation point” on your Roomba means and how can you fix it.
Red Light Ring Waves Down
This may also be the source of your Roomba blinking red, as indicated in the last part; if your Roomba dustbin is full and waves a red light in a downward circle, it must be emptied before it can resume operation.
Therefore, all you need to do to turn off the red light is to empty the garbage container outside and wipe it down with a clean cloth. Make sure the dustbin is completely empty in addition to checking to see whether the filter is clogged.
So the next time your Roomba flashes a red light, don’t panic. Look at the movement of the light pattern. Your battery is nearly empty if it is only blinking, so you should immediately plug it into the charging station. Your battery will run out soon if the light rotates clockwise and the battery level is 15%.
Why Is My Roomba Flashing Red Light During Charging
Roombas are quite good at communicating nonverbally. If yours has a red light that flashes while it charges, it is cheerfully consuming all the energy required to perform another sprint around your house. It’s a totally common sign that the device is charging properly.
Tips On Charging Roomba Vacuum Cleaners
If you don’t take care of your robot vacuum, it can always have low battery power and won’t be ready to clean when you need it. This frequently occurs to busy owners who purchase a robot vacuum and fail to remember that even robots require much care and upkeep. We’ve provided some charging advice for your Roomba vacuum cleaner below to help you avoid any potential future inconveniences:

- Ensure that your machine is charging or has just been charged. It can take roughly two hours to fully recharge. For a domestic application, it is not a lengthy period. However, in a crisis, this may seem to take an eternity.
- The iRobot Home app features a battery symbol in the top-right corner, which you can use to check the Roomba’s battery life. You might determine the present state of your robot vacuum with a short glance. The App will display the “Charging” message on the clear screen if the device isn’t fully charged. This does not, however, imply that you may utilize it immediately. Even if you see the “Ready to clean” indication, your Roomba machine may be prepared for a cleaning cycle.
- The Clean screen will turn to “Fully charged” after the battery is fully charged. You can now get the most vacuuming minutes out of your machine.
- Replace the battery in your Roomba machine using only genuine parts. Avoid being cheap and purchasing knockoffs from a third-party brand, particularly if the brand has no reputation.
You can obtain a low-quality, fake battery that doesn’t perform or perhaps poses serious risks like explosions. Use your machine’s original battery first. If you require a genuine battery for your Roomba robot vacuum, contact iRobot customer care or your local authorized merchant.
- Store the battery in a cool, dry place if you won’t use your Roomba vacuum for longer than two weeks (such as during a lengthy trip).
- The battery may deteriorate severely if you frequently notice a red light blinking. For the Roomba’s battery to last as long as possible, you should replace it immediately.
- In the interim, you should keep a tight eye on the battery level and charge the device whenever you can.
Another choice to take into consideration is reducing usage.
- Your Roomba vacuum always uses some electricity once it is turned on. While waiting for your orders, the WiFi connection also consumes a tiny amount of power. This is why your Roomba vacuum eventually runs out of battery, even if you start a cleaning session.
To further reduce the machine’s power consumption, you can put it in Standby mode. In the mobile App, you can activate this power-saving mode. Reduced Power Standby, Mode can be accessed by going to More > Settings.
Why Does My Roomba Light Up At Night
Have you ever noticed your Roomba lighting up by itself at night? Does it scare you? Do you believe a ghost may have gotten inside your Roomba? So this isn’t the reason. It’s rather typical for your Roomba to light up at night, and this is because either it is busy doing its stuff or needs your assistance. As we stated previously, the Roomba uses the light ring to try and let you know when something is wrong.
Your vacuum cleaner communicates with itself using three lights, as we’ve already mentioned:
- White
- Blue
- Red (already discussed in detail)
White
The Roomba’s white light signifies that it is working on some of its stuff and that there are no issues.
White – with a white light, the Roomba indicates that it is working on something without problems.
- White light rotates clockwise: installing or updating software
- White light stays on (solid): the Roomba is fully charged.
- The lower half of the light ring flashes: Charged and parked at the docking station,
- White light spins around: (battery has a charge of above 15%)
- White light spins and stays on at a third: Battery 33% charged
- White light spins and stays on halfway: Battery charged to 67% of capacity
- White light spins: Battery almost fully charged (over 85%)
- White light waves from top left to bottom right: Roomba is busy with the cleaning task.
Blue
When the robot vacuum cleaner has a blue light, it is active and might be engaged in setting up the WiFi network, for instance.
- Blue light rotates clockwise: Connects to the WiFi network
- Blue light rotates counterclockwise: Focusing on Spot Cleaning
- Blue light marches forward: Drives back to the charging station
- Blue ping on the front: Virtual wall recognized
- Blue flashing light: Dirt Detection Activated
- Blue light sweeps forward: The automatic emptying station is being used
So now you are aware of the purpose of your Roomba’s nighttime light flashing. The topic of the Roomba red light flashing was already covered at the outset of this article.
How Can I Fix My Roomba Flashing Full Dustbin Issue
You know that when your Roomba’s red trash can sign flashes, it indicates that the bin inside is full.
The standard bin volume of Roomba robot vacuum models is 0.5 liters. To illustrate how much dirt can fill the bin before the red trash can sign appears, certain containers might have more or less than that amount.
You should quickly clean the trashcan when that red symbol begins to flash. This is because a full bin will have less suction strength than is necessary to remove dirt from your floor. Your Roomba will consequently clean less thoroughly.
The Roomba will halt its cleaning cycle if the red trash can symbol is disregarded and the bin fills to its maximum capacity. Once the bin is empty and it is possible to continue collecting dirt, the robot vacuum will only start cleaning once more.
The Clean Base docking station is compatible with some Roomba machines. Therefore, the device will dock with the Clean Base and empty its bin automatically when the red trash can on those Roomba models flashes. The Clean Base’s bag may contain up to 60 days’ worth of dust before you need to take it out.
| Step | Action |
|---|---|
| 1 | Clean onboard dustbin: Detach, empty, and remove debris |
| 2 | Clean air filter: Remove, shake, and replace if necessary |
| 3 | Clean full bin sensors: Ensure sensors are debris-free |
What Do I Do If My Roomba Bin Is Full?
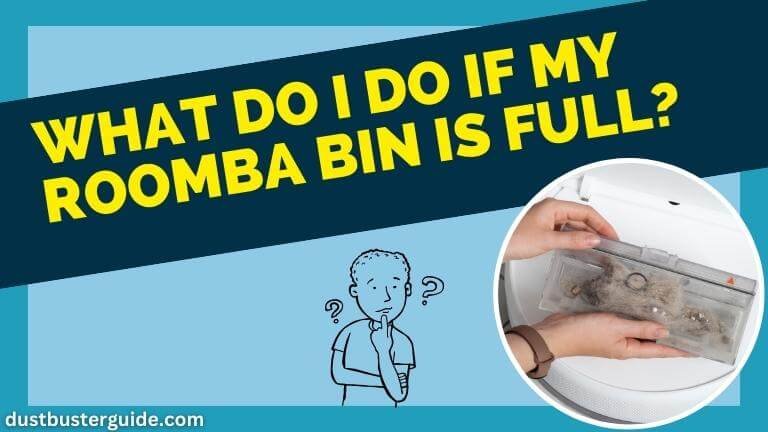
You must start by properly cleaning the bin when your Roomba bin is full and the red trash can icon begins to flash. The trash can isn’t the only component, though.
The cleaning procedure will instead include the following:
- Step 1 – Emptying the Roomba’s onboard trash
- Step 2 – The air filter
- Step 3 – The full bin sensors
When your Roomba bin is full, follow these cleaning instructions:
Step 1: Clean The Onboard Dustbin
The first step is to clean the onboard trash can. Here’s how to do it:
- First, press the button that keeps the trash can attached to the Roomba’s body, the bin release button.
- Next, remove the trash can. Consider where and how you execute this activity, as some dust may fly out as you do it. It is advisable to place the trash can in a place that isn’t very windy.
- Open the bin door; you’ll see a door that keeps the dust inside. Only unlock that door when you’re prepared to empty the trash.
- Next, empty the bin by turning it over and shaking out all the dust. You’ll probably need to shake the Roomba’s bin for at least a few seconds to get the majority of stuff out.
- Pull out sticky dirt
- Look inside the bin for any lingering filth, dust, or debris after you are certain it is empty. You’ll need to take those items out to completely clean the bin.
Step 2: Clean The Air Filter
Now that the Roomba’s bin has been thoroughly cleaned, it’s time to clean the supporting components.
Additionally, the bin of your Roomba robot vacuum features an air filter. To maximize the efficiency of your Roomba, you will need to clean that item next.
Here’s how to go about it:
- Open the filter door to reveal the air filter for your Roomba, which is placed on the dustbin. In order to access the air filter, first open the filter door.
- After that, take the filter out of the trash. The manufacturer has added a tab that you may pull to remove the filter, simplifying this operation.
- Shake off any material, and then put the filter in the garbage. By shaking and hitting the filter on the side of your trash can, you can get rid of the dust within. Once more, exercise caution as you might breathe in some stray dust.
- After confirming the filter is clean, place it back in the trash can and close the door.
- Check the filter’s condition while cleaning it, and replace it if necessary. Filters should be changed every few months or as soon as you see that yours is beginning to wear out.
Step 3: Clean The Full Bin Sensors
One vital component still needs your attention after you have cleaned the trash can and the air filter. Unfortunately, many users often ignore this section since they are unaware that it exists.
Cleaning the full bin sensors on the dustbin and the Roomba device is the final procedure. These sensors must be fully cleaned to prevent the Roomba from erroneously believing that the bin is full even though you’ve already emptied it.
What you need to know is as follows:
On A Roomba, How Many Full Bin Sensors Are There?
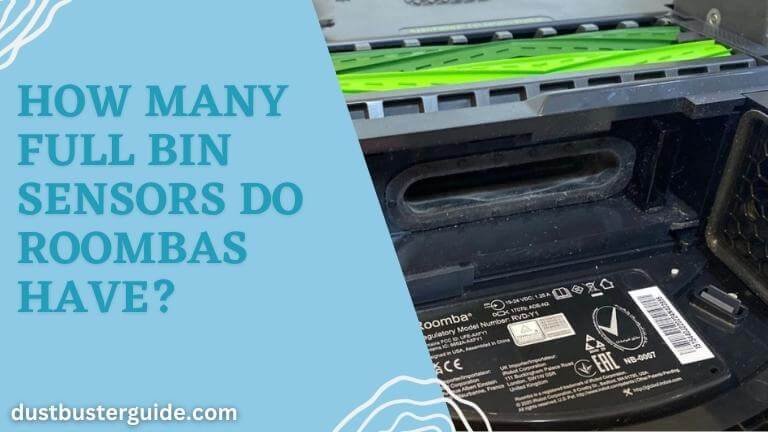
The six full bin sensors that need cleaning are six in all. Please see the user handbook if you require assistance locating and recognizing each one.
How Can A Roomba’s Full Bin Sensors Be Cleaned?
The process of cleaning the sensors is quite simple and quick. Simply give each sensor and the items nearby a thorough wipe-down. You must ensure that the sensors and the areas around them are dust-free.
After doing the three cleaning tasks outlined above, you can attach the dustbin to your Roomba machine. Push it until it clicks into place to accomplish this.
Why Does My Roomba Keep Saying Empty The Bin When It’s Empty?
When its full bin sensors are still dirty, your Roomba will keep asking you to empty the bin (even if you’ve already cleaned it).
Remember: your Roomba shouldn’t continue to flash the red trash can signal once the cleaning procedure is over. However, if you don’t empty all six full bin sensors, the red trash can light will continue to flash.
Even though you have completely cleaned it, the Roomba may still display an error and instruct you to remove the trash.
After ensuring each sensor is clean, you can restart your Roomba to fix the error. You can achieve this through power cycling, which involves taking out the battery for five minutes and then reinstalling it.
How To Check ‘Robot Health’ Using The iRobot App
The technology behind the Roomba is improving every day. Prior to recently, it was challenging to pinpoint the precise cause of issues with our robot vacuum. However, it’s now so simple.
For instance, if you have an iRobot Roomba j7+, a more modern model, you should know that the iRobot app contains a section called Robot Health. The App displays in this section if your robot vacuum needs repair because of a problem with a specific component.
You must go into your iRobot account and select the settings icon in order to use Robot Health. You can locate this option next to your device’s name in the “Robot Health” section of the information on your robot vacuum. This gives the filter and brushes an exact amount of effective working hours.
You can get an idea of when you need to replace them by looking at the remaining minutes. If you are aware of this fact, you can avoid red lights and error messages.
It is obvious that keeping your iRobot Roomba well-maintained and attending to its cleaning and maintenance requirements regularly will considerably extend its lifespan.
Why Does My Roomba Die Before Successfully Docking
If your Roomba is dying before successfully docking, there could be a few reasons behind this issue. Firstly, check the charging contacts on both the Roomba and the docking station for dirt or debris that might hinder a proper connection.
Clean these contacts to ensure a secure charging connection. If the issue persists, it might be related to a depleted or failing battery. Over time, the battery capacity of a Roomba can diminish, and if the battery no longer holds a charge effectively, the robot may not reach the docking station before running out of power.
In such cases, replacing the battery could resolve the problem. Additionally, ensure that the docking station is placed in an easily accessible location, free from obstacles, and the Roomba’s sensors are clean to facilitate proper navigation and docking.
If troubleshooting these steps does not resolve the issue, consulting Roomba’s user manual or reaching out to the manufacturer’s customer support may provide further guidance.
Conclusion
So here is a complete post to answer your question, why is my Roomba flashing red.
Two things can be inferred from a Roomba’s flashing red light: the dirt bin is full, or the Roomba is nearly out of power. Let the battery charge completely, or wipe the trash can if the light blinks. A thorough understanding of this system enables you to rapidly solve your machine’s problem.
Additionally, if your Roomba is flashing at night, it is either attempting to connect to the internet, updating its software, busy in spot cleaning, or charging.
Never forget that the “robot health” section of your iRobot app always allows you to monitor the state of your Roomba.
FAQs
How to Tell if Roomba is Charging?
When you set your Roomba robot vacuum to charge, the indicator will flicker for 60 seconds before turning it off to conserve energy. To view the charging status, you can also press the CLEAN button.
Why is Roomba Not Charging?
If your Roomba isn’t charging, it’s either because the device’s contact points are dusty or the base station isn’t connected to the power source. Ensure your robot vacuum’s contact points are clean before the base station is linked to the power source.
How long does it take a Roomba to charge from a dead battery?
It takes at least two hours to charge a device normally. Use just the battery type compatible with your robot for best results, and make sure it is an original iRobot Lithium Ion/NiMH battery that is either included with Roomba or purchased from iRobot authorized dealers.
Does the Roomba charging light stay on?
As the robot continues to charge, the light on the Home Base® will turn on for about four seconds before going off. Your robot’s light ring will turn on to show that it is charging.
Is it OK to leave Roomba plugged in all the time?
When not in use, keep the Roomba plugged in. As soon as you can, recharge the Roomba. Roomba’s battery can be harmed if not recharged for several days. Take the battery out of the Roomba and keep it somewhere cold and dry for storage when not in use.
What does the flashing orange light on Roomba mean?
A flashing orange light on a Roomba typically indicates a charging error. Check for any issues with the charging contacts, power source, or docking station, and refer to the user manual for troubleshooting steps.
Why is the WiFi light flashing on my Roomba?
A flashing Wi-Fi light on a Roomba indicates that it’s attempting to connect to a Wi-Fi network. Ensure the Wi-Fi network is operational, and check if the Roomba is within range. Follow the Wi-Fi setup process in the Roomba app or refer to the user manual for assistance.
External Resources
- LADYBIRD: The Animal-Friendly Robot Vacuum Cleaner – AAAI
- Multifunction Vacuum Cleaning Robots Market Research Analysis With Types, Applications And Growth Production Analysis With Top Players – Digital Journal
- Vacuum Cleaner Friction Injuries In Paediatrics: A 10 Year Review Of National Trends – ScienceDirect
- Modifications Of A Handheld Vacuum Cleaner For Noise Control – ResearchGate

